Blog
How to Make a Hussar Jacket: Complete DIY Guide with Expert Tips and Techniques
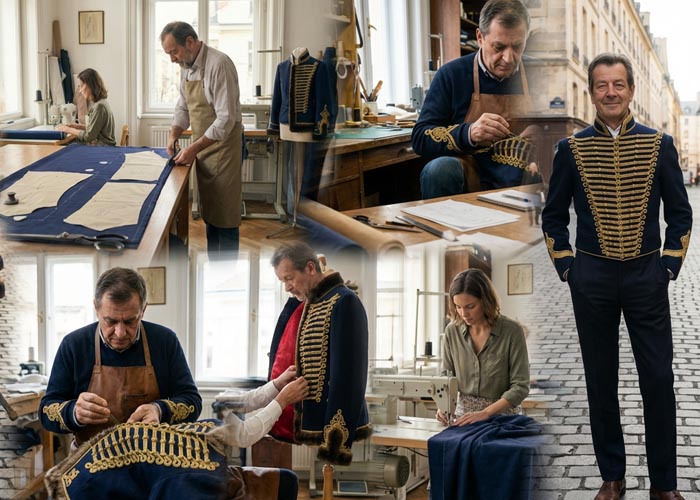
Creating a hussar jacket from scratch represents an exciting journey into historical fashion that combines traditional military styling with modern craftsmanship. These distinctive garments, originally worn by elite Hungarian cavalry soldiers during the 18th and 19th centuries, have captured the imagination of fashion enthusiasts, cosplay artists, and historical reenactors worldwide. The intricate braiding, bold colors, and structured silhouette make hussar jackets instantly recognizable and eternally stylish. Whether you’re preparing for a theatrical production, costume event, steampunk convention, or simply want to add a unique statement piece to your wardrobe, this detailed guide provides all the knowledge needed to create a professional-quality garment.
Understanding Hussar Jacket History and Distinctive Design Features
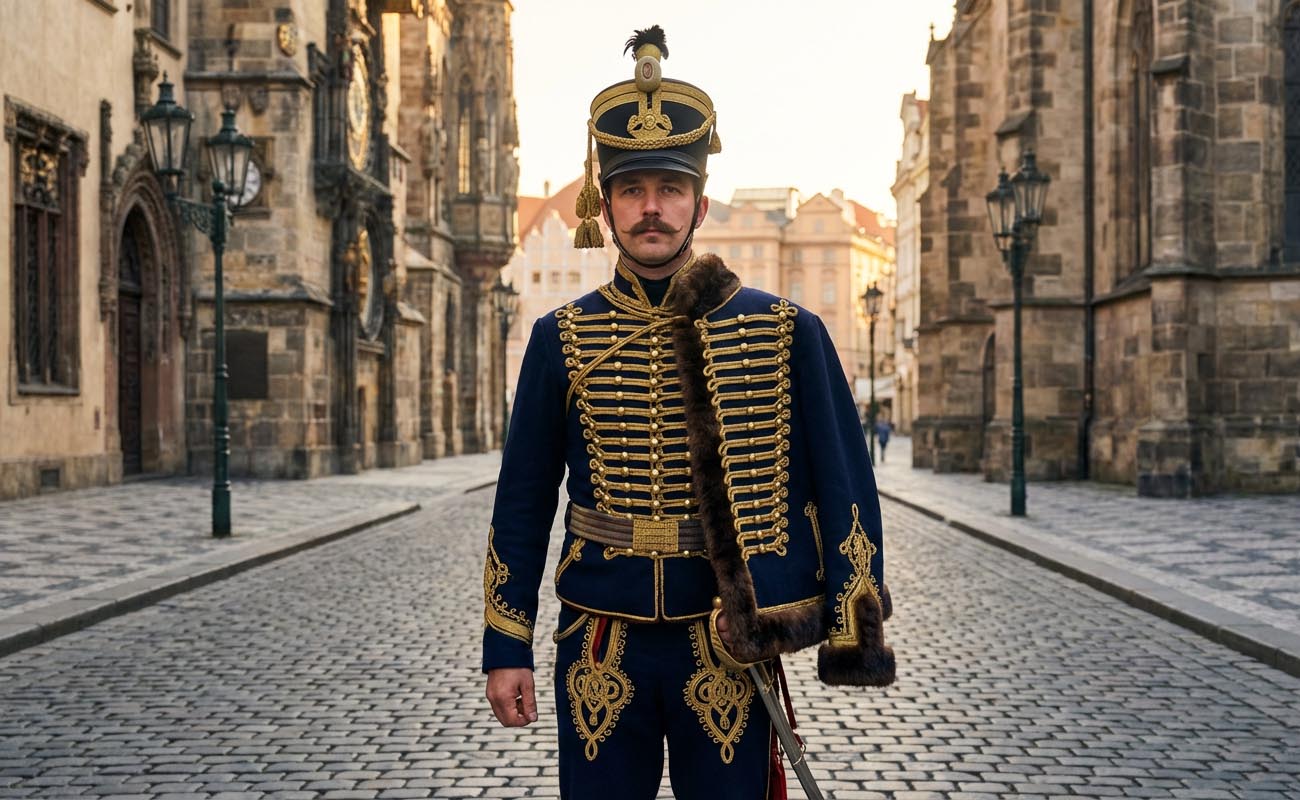
The hussar jacket carries a fascinating heritage that spans several centuries of military tradition and fashion evolution. These garments originated with Hungarian light cavalry units during the 15th century, eventually spreading across European armies by the 1700s as their striking appearance gained widespread recognition. Traditional hussar jackets featured high-standing collars, elaborate gold or silver cord braiding across the chest, multiple rows of decorative brass buttons, intricate frog closures, and fitted silhouettes that emphasized the wearer’s physique. The ornate decorations served purposes beyond mere aesthetics, as the elaborate cord work helped secure jackets during mounted charges while rich fabrics provided warmth in harsh conditions.
Modern interpretations maintain these signature elements while incorporating contemporary tailoring methods and accessible materials. Understanding these fundamental design principles helps you make informed decisions throughout your construction process, whether creating a historically accurate reproduction or a modern fashion adaptation. The distinctive features include the cropped waist-length cut, decorative braiding patterns that often followed specific regimental designs, prominent epaulettes on the shoulders, and elaborate frogging down the front closure. Taking time to study authentic examples through museum collections and historical photographs provides valuable insights into traditional construction methods.
Essential Materials and Supplies for Hussar Jacket Construction
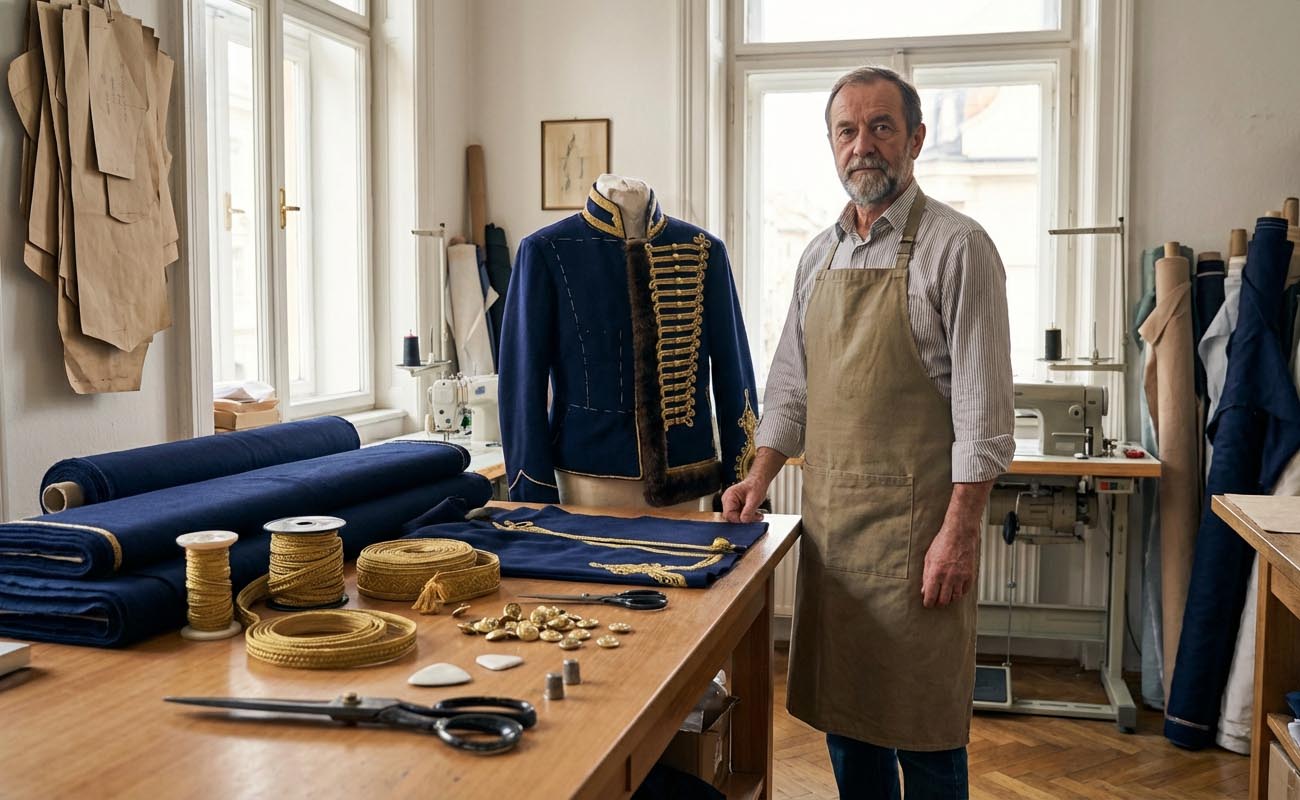
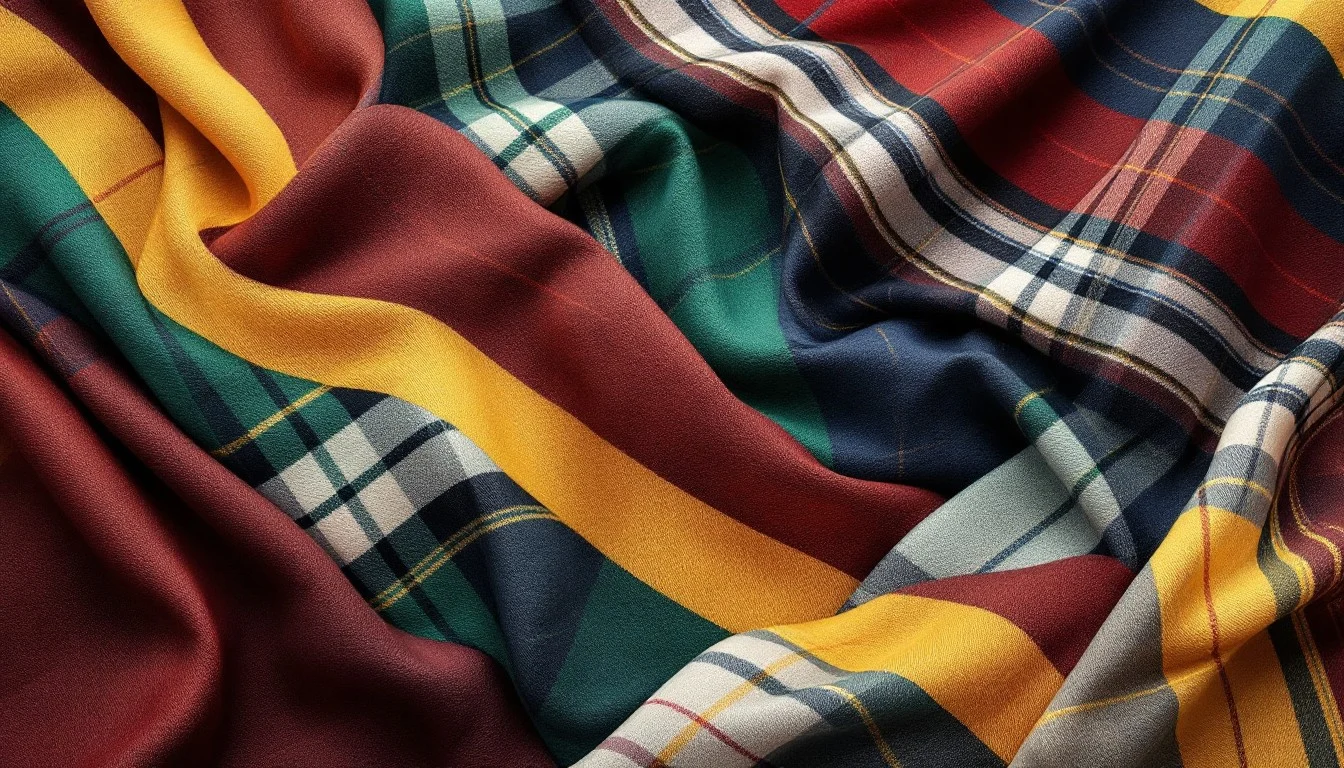
Gathering high-quality materials before beginning your project ensures better results and a smoother construction process. The main body fabric should be medium to heavyweight wool suiting, wool blend fabric, or heavy cotton twill for more affordable options, requiring approximately 2 to 3 yards depending on jacket size. Choose rich colors like navy blue, burgundy, forest green, or classic black that reflect traditional military aesthetics. For lining material, select satin, silk charmeuse, or polyester lining fabric in complementary colors, needing approximately 2 yards to create a comfortable interior.
Additional Materials Required:
- Heavy-duty military-style buttons in brass or silver finish (20-30 pieces)
- Fusible interfacing for collar, lapels, and front edges
- Gold or silver military cord braiding (25-40 yards)
- Shoulder pads for a structured appearance
- Hook and eye closures for interior fastening
- Optional fur trim for collar embellishment
The necessary tools include a reliable sewing machine capable of handling thick fabrics, sharp fabric shears, hand sewing needles, measuring tape, tailor’s chalk, seam ripper, iron and pressing equipment, and straight pins. Investing in quality materials significantly impacts your final result, particularly for the outer fabric and decorative braiding that define the jacket’s appearance. Consider purchasing extra braiding to allow for mistakes during the learning process, as applying decorative cord requires practice to achieve professional results.
Selecting and Modifying Your Hussar Jacket Pattern
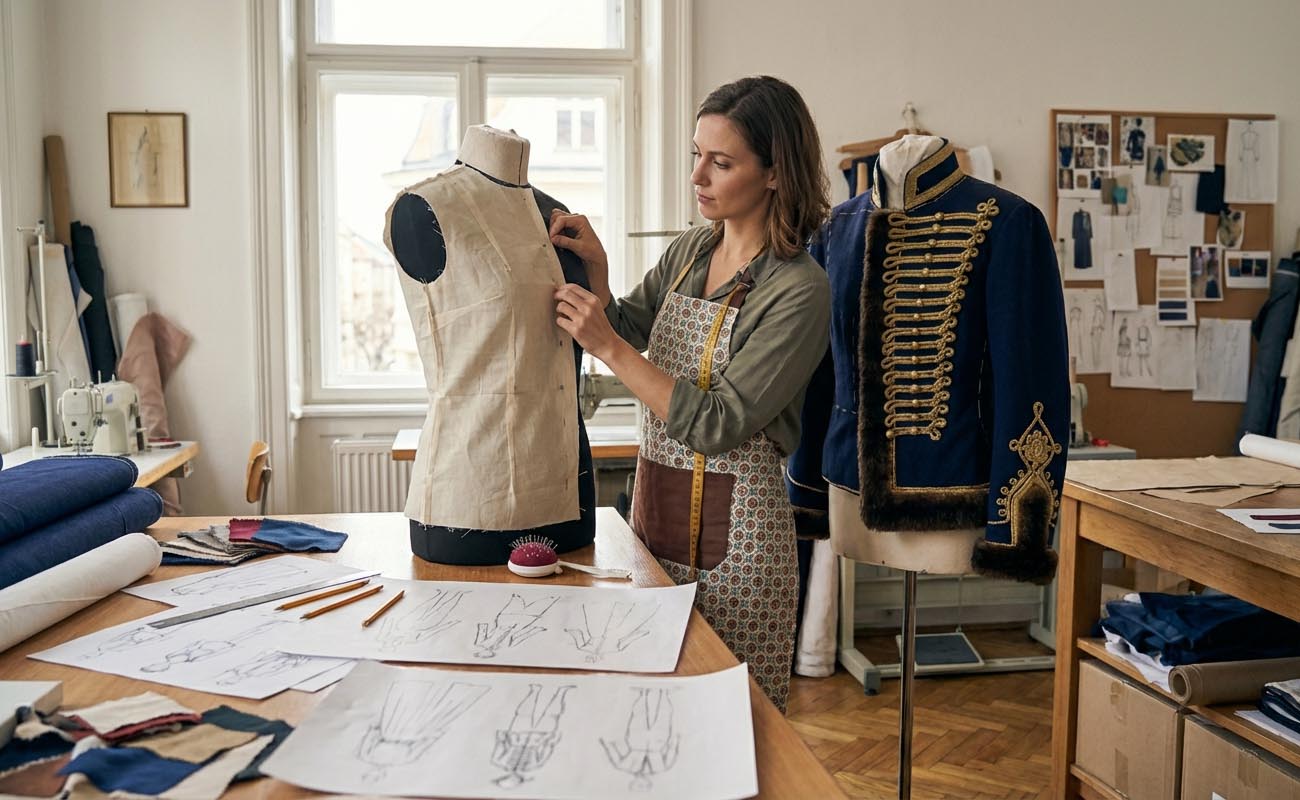
Finding the right pattern forms the foundation of your hussar jacket project and significantly affects the outcome. Several commercial pattern companies offer military-inspired jacket designs that can be adapted for hussar styling, including Folkwear patterns for historical clothing, Simplicity patterns with military jacket options, and McCall’s historical costume patterns. When selecting a base pattern, look for designs featuring fitted bodices that taper at the waist, high collar construction, set-in sleeves with proper ease, and front closure systems that accommodate decorative frogging.
Pattern modification techniques allow you to transform standard jacket patterns into authentic hussar styling through strategic adjustments. The collar should be raised significantly higher than typical jacket collars, standing approximately 2 to 3 inches tall when finished. Adjust the jacket length to hit at the natural waistline or slightly above, as hussar jackets were shorter than standard military coats to facilitate horseback riding. Consider creating a muslin test garment before cutting your fashion fabric, especially when working with expensive materials or making significant pattern modifications.
Cutting and Preparing Fabric Pieces for Assembly
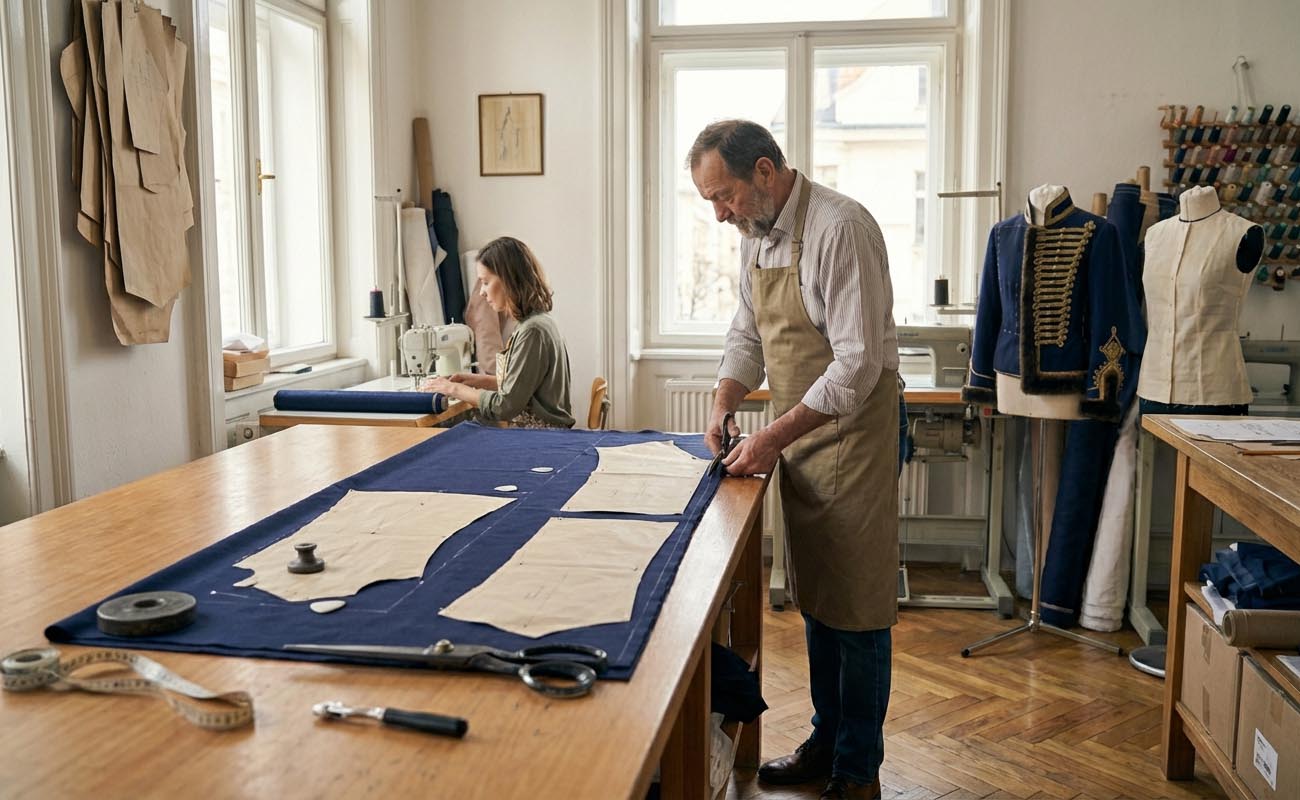
Proper fabric preparation and careful cutting ensure accurate construction and professional results in your finished jacket. Begin by pre-washing your outer fabric according to manufacturer recommendations to prevent shrinkage in the completed garment. Press all fabrics thoroughly to remove wrinkles and ensure accurate pattern placement. Check your fabric grain and lay pattern pieces following grain lines precisely, as off-grain cutting causes twisting and poor fit.
Pin pattern pieces securely every 3 to 4 inches, placing pins within seam allowances to avoid marking the fabric. Mark all pattern notches, darts, and construction lines using tailor’s chalk or fabric markers. Cut interfacing pieces for collar, lapels, and front facings, then apply fusible interfacing according to the manufacturer’s directions. Organize all cut pieces by garment section to avoid confusion during assembly.
Constructing the Main Jacket Body and Joining Seams
Begin jacket construction by assembling the main body pieces using proper tailoring techniques for durable seams. Start with the back piece, joining the center back seams if your pattern includes them, and pressing seams open for a flat finish. Sew shoulder seams next, joining front and back pieces at the shoulders with backstitch reinforcement at stress points. Construct front darts if included in your pattern, then join side seams from armhole to hem.
Press all seams carefully as you work, understanding that proper pressing represents half the work in quality tailoring. Use a pressing cloth between your iron and wool fabric to prevent shine and protect the fabric surface. Press seams open whenever possible to reduce bulk, particularly important where multiple seam intersections create thickness. Try on your jacket body at this stage to check fit before proceeding with collar and sleeve construction.
Creating the High Stand Collar and Lapel Details
The distinctive high collar defines hussar jacket styling and requires careful construction for proper appearance and comfortable wear. Cut collar pieces according to your modified pattern, including outer fabric, interfacing, and lining pieces. Apply fusible interfacing to the wrong side of the outer collar pieces for adequate support and body. The collar should stand approximately 2 to 3 inches tall when finished, with sufficient height to frame the face while remaining comfortable.
Sew collar pieces right sides together, stitching around outer edges while leaving the neck edge open for turning. Trim seam allowances to reduce bulk and clip curves carefully without cutting stitching. Turn the collar right side out, press carefully, and attach to the jacket neckline with the raw edges aligned. For lapels, if your design includes them, interface lapel areas thoroughly to maintain crisp fold lines and prevent sagging.
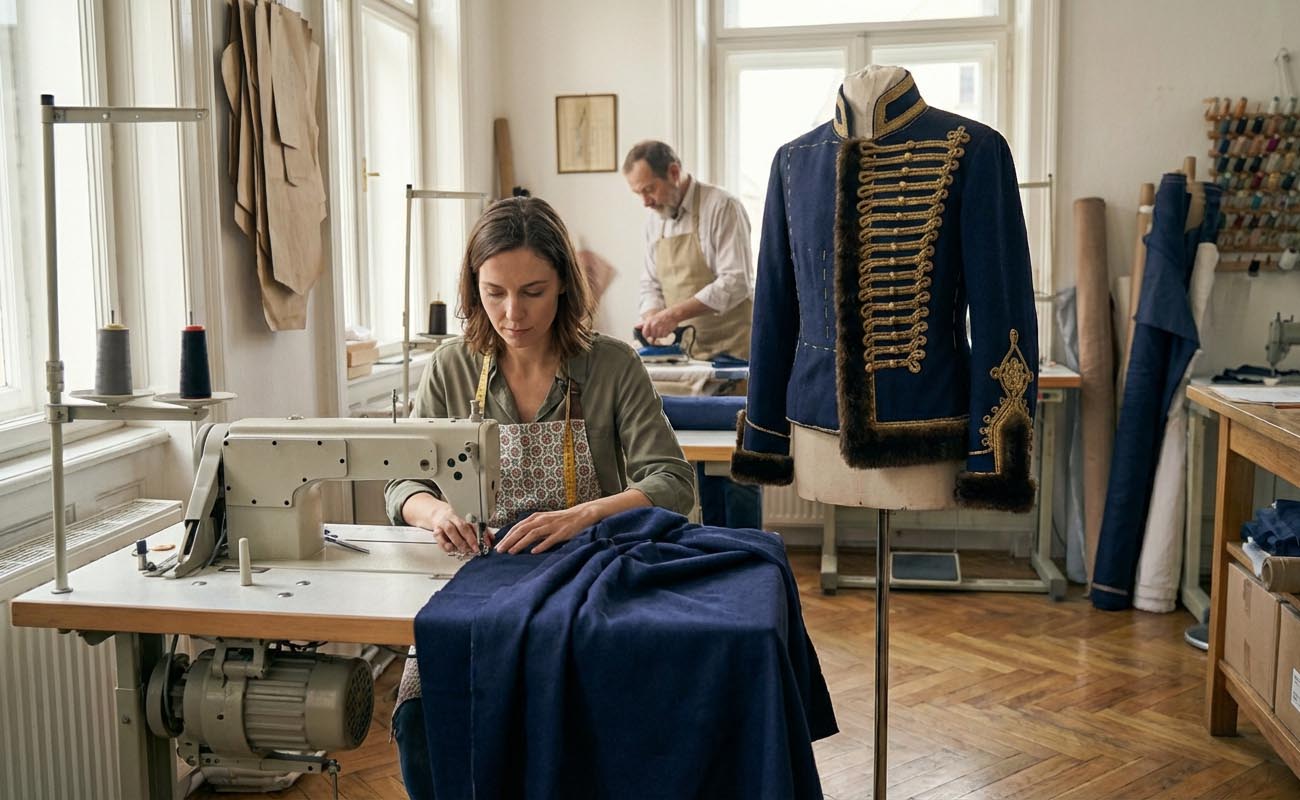
Setting Sleeves and Creating Proper Armhole Fit
Sleeve construction and setting require precision for comfortable movement and a professional appearance in your finished jacket. Begin by sewing sleeve seams from cuff to underarm, matching notches carefully and reinforcing underarm stress points. Press sleeve seams open to reduce bulk in the armhole area. Create a sleeve header by gathering or pleating the sleeve cap between notches to create the rounded shape characteristic of tailored jackets.
Pin sleeve into armhole right sides together, matching underarm seams, notches, and shoulder points precisely. Baste the sleeve in place to check fit and adjust if necessary before permanent stitching. Machine stitch the sleeve securely using two rows of stitching for strength. Add shoulder pads if desired, positioning them to extend slightly beyond the natural shoulder line for a military silhouette.
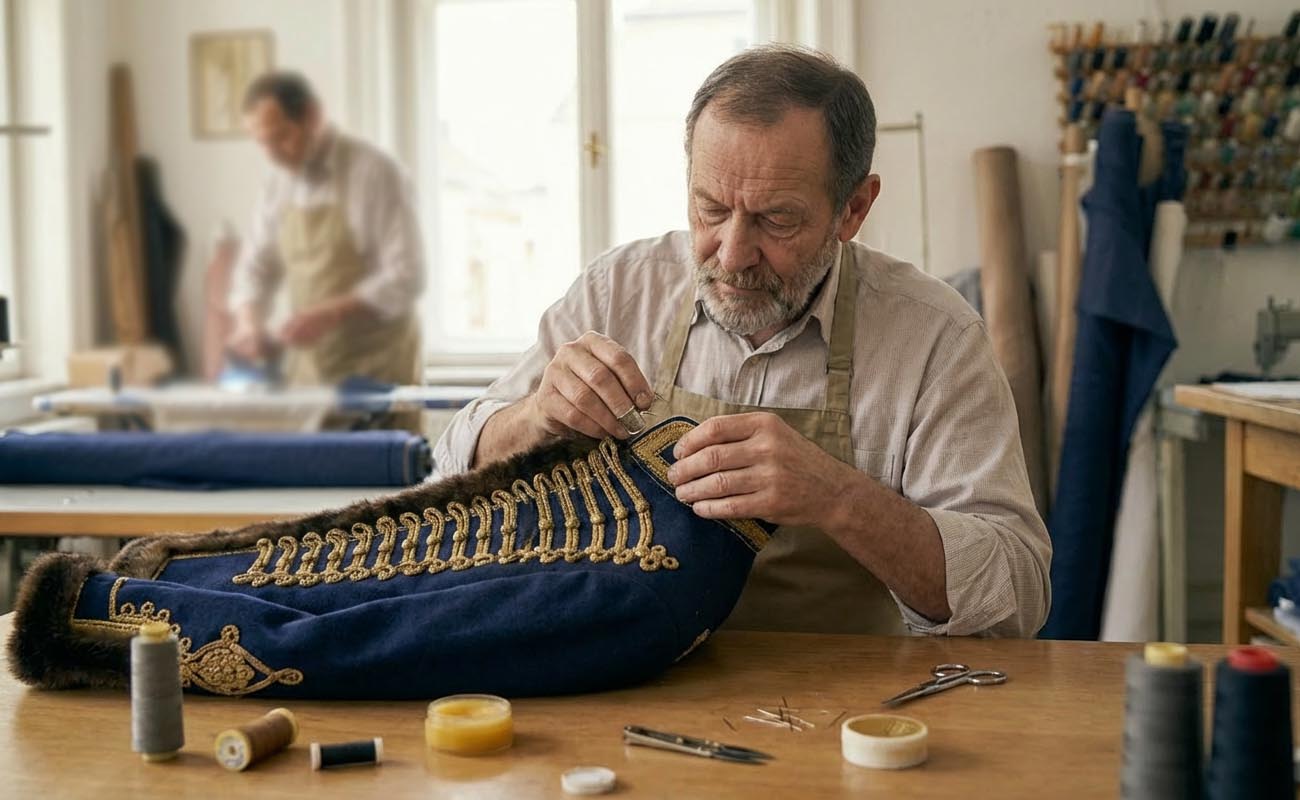
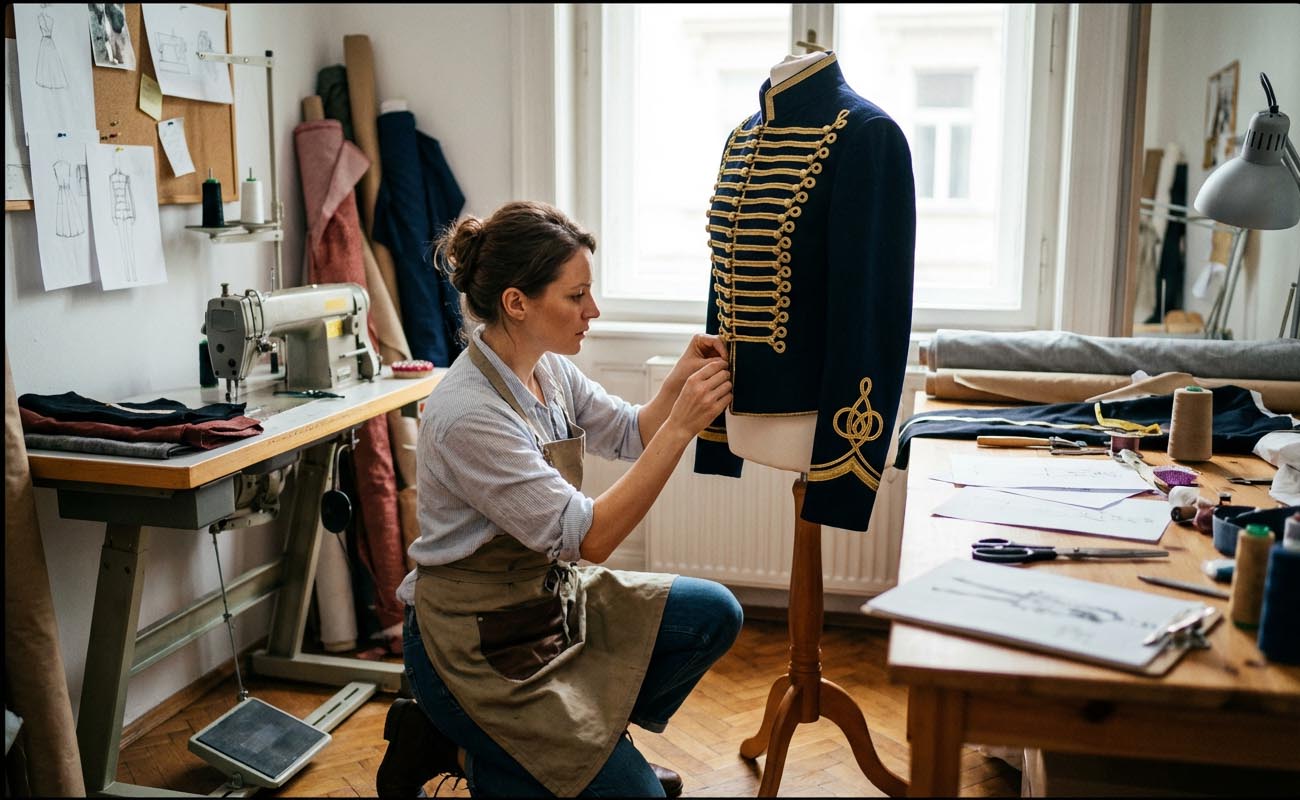
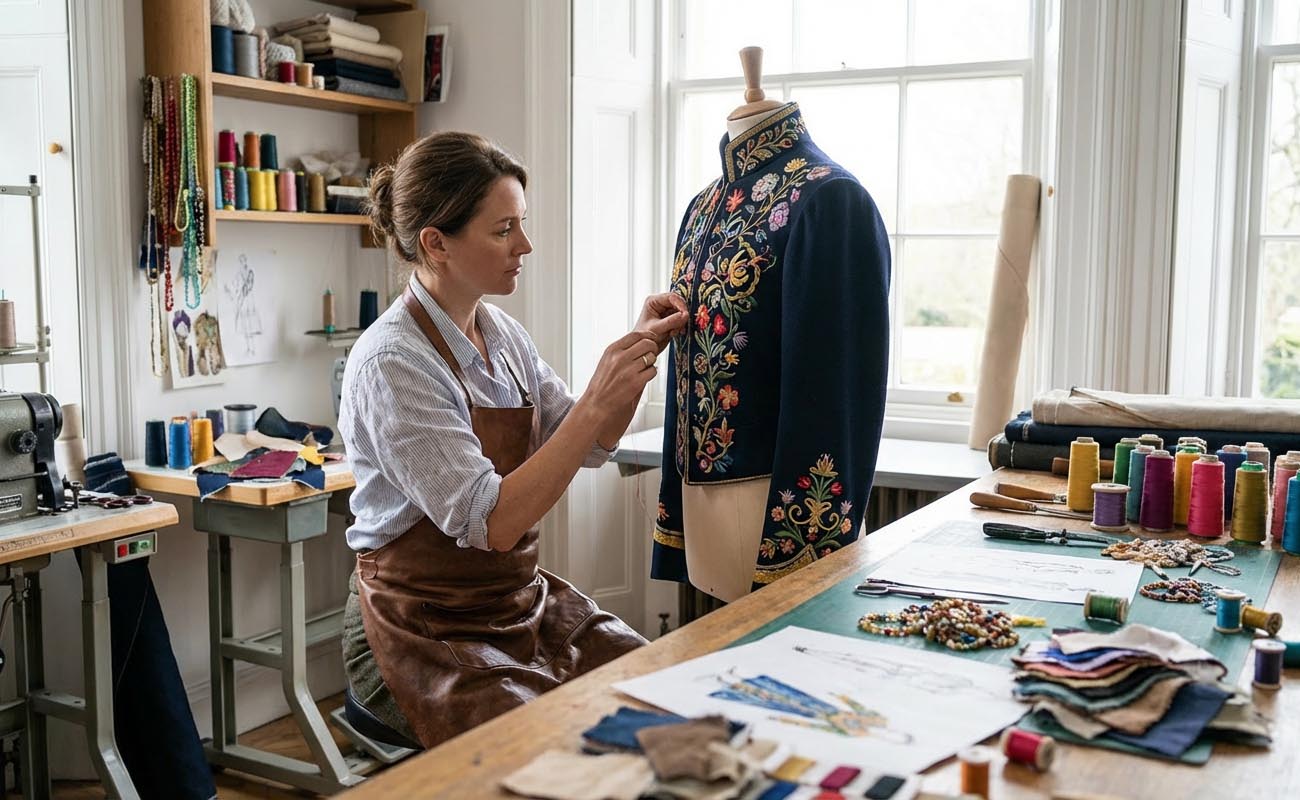
Applying Decorative Military Braiding and Frogging
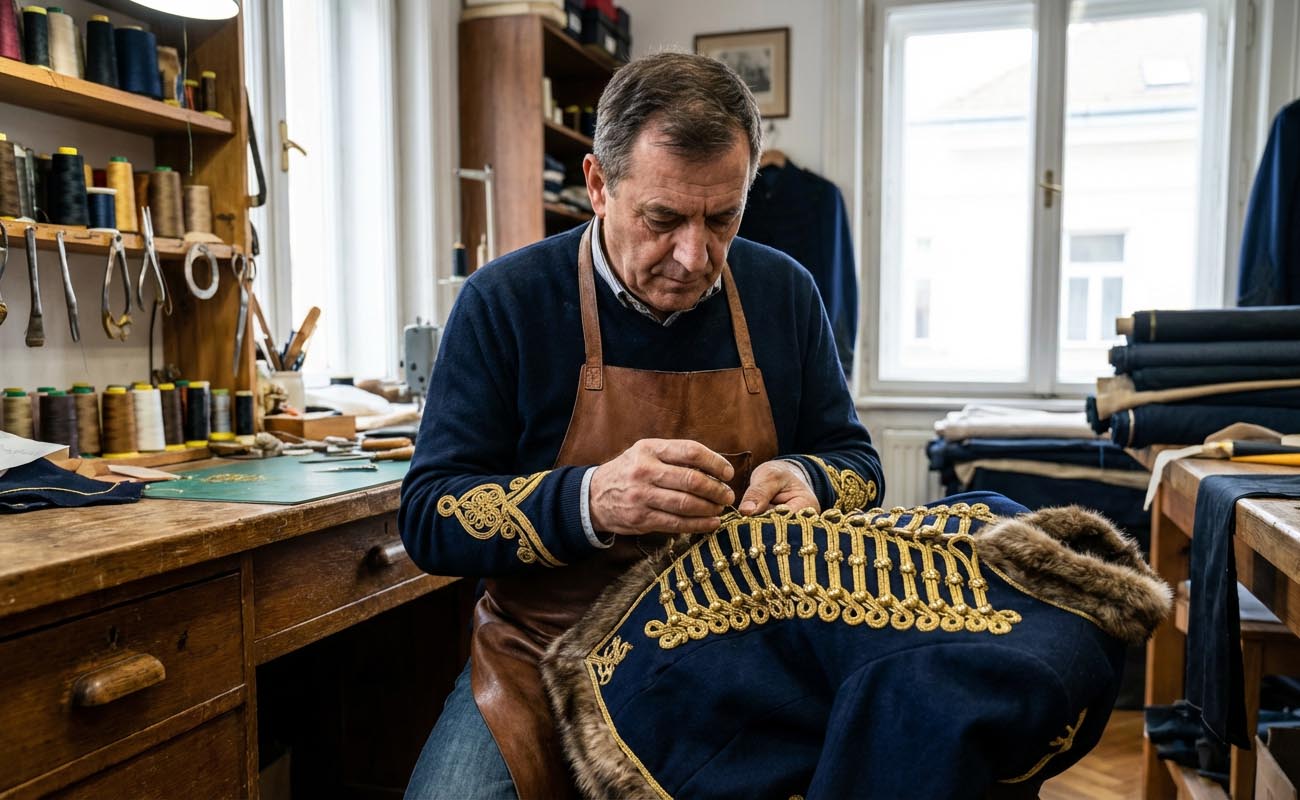
The elaborate braiding transforms your basic jacket into an authentic hussar masterpiece and represents the most visible expression of military styling. Plan your braiding design carefully before beginning application, sketching the pattern on paper or directly on the jacket fabric using removable markers. Traditional hussar jackets featured symmetrical patterns across the chest, with multiple rows of horizontal braiding connected by vertical or diagonal bars creating geometric designs.
Key Braiding Application Tips:
- Start from the center front and work outward for symmetrical placement
- Pin the entire design before sewing to ensure a balanced appearance
- Use small slip stitches along both edges of the cord
- Keep stitches invisible from the right side
- Maintain consistent spacing between parallel rows
Hand-sewing braiding requires patience but produces superior results compared to machine application. Use a thread matching the braid color to make stitches virtually invisible. Create dimensional elements by layering braiding, or forming loops that stand away from the jacket surface. Position frogs at strategic intervals down the jacket front, typically 4 to 6 closures depending on jacket length.
Installing Lining and Finishing Interior Details

Proper lining installation creates a polished interior that protects construction seams and allows easy wearing over other garments. Construct lining pieces following the same sequence used for the outer jacket, sewing shoulder seams, side seams, and setting sleeves. The lining should be slightly smaller than the outer jacket to allow for ease when wearing. Press the seams open for a flat finish.
Insert lining into jacket wrong sides together, matching shoulder seams, side seams, and armhole seams. Pin lining to the jacket around the neck edge, front opening, and hem, turning under raw edges for a clean finish. Hand-stitch lining to the jacket using slip stitches that catch only the lining and the jacket seam allowances. Add functional closures, such as hooks and eyes, at the interior front opening to secure jacket closed beneath decorative frogging.
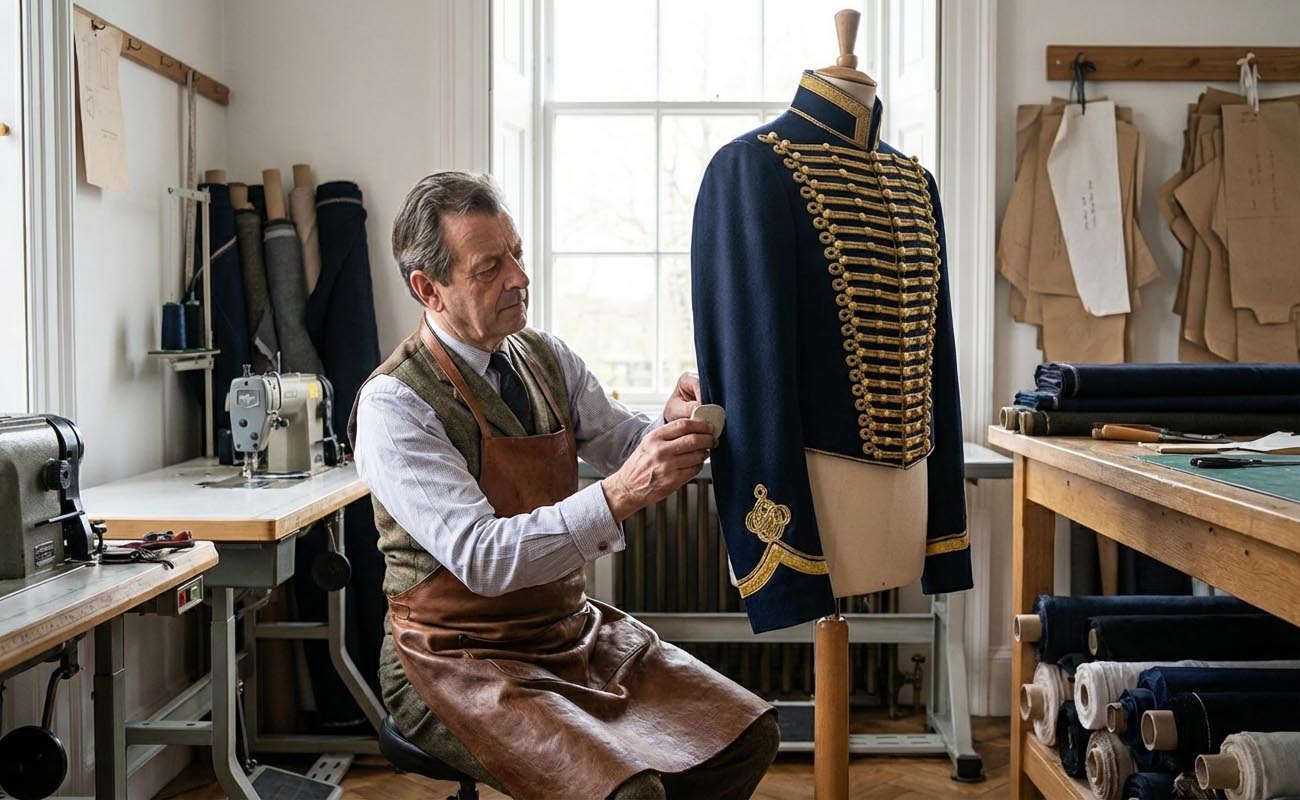
Adding Buttons, Final Details, and Quality Finishing Touches

The final assembly stage brings all elements together into your completed hussar jacket and requires careful attention to finishing details. Select military-style buttons that complement your braiding color, choosing brass for gold braiding or silver-toned buttons for silver cord. Mark button placement carefully, ensuring even spacing and alignment with frog closures. Sew buttons securely using button thread or doubled regular thread, creating a thread shank beneath the buttons to accommodate fabric thickness.
Complete all hand-finishing touches, including securing any loose braiding ends, reinforcing stress points at closures, and removing any visible basting stitches. Press the finished jacket thoroughly from the wrong side, using pressing cloth to protect the decorative braiding from direct heat. Try on your completed jacket and make any final fit adjustments needed. Add optional embellishments such as epaulettes on shoulders, decorative piping along edges, or embroidered regimental insignia that personalizes your creation.
Caring for Your Handmade Hussar Jacket
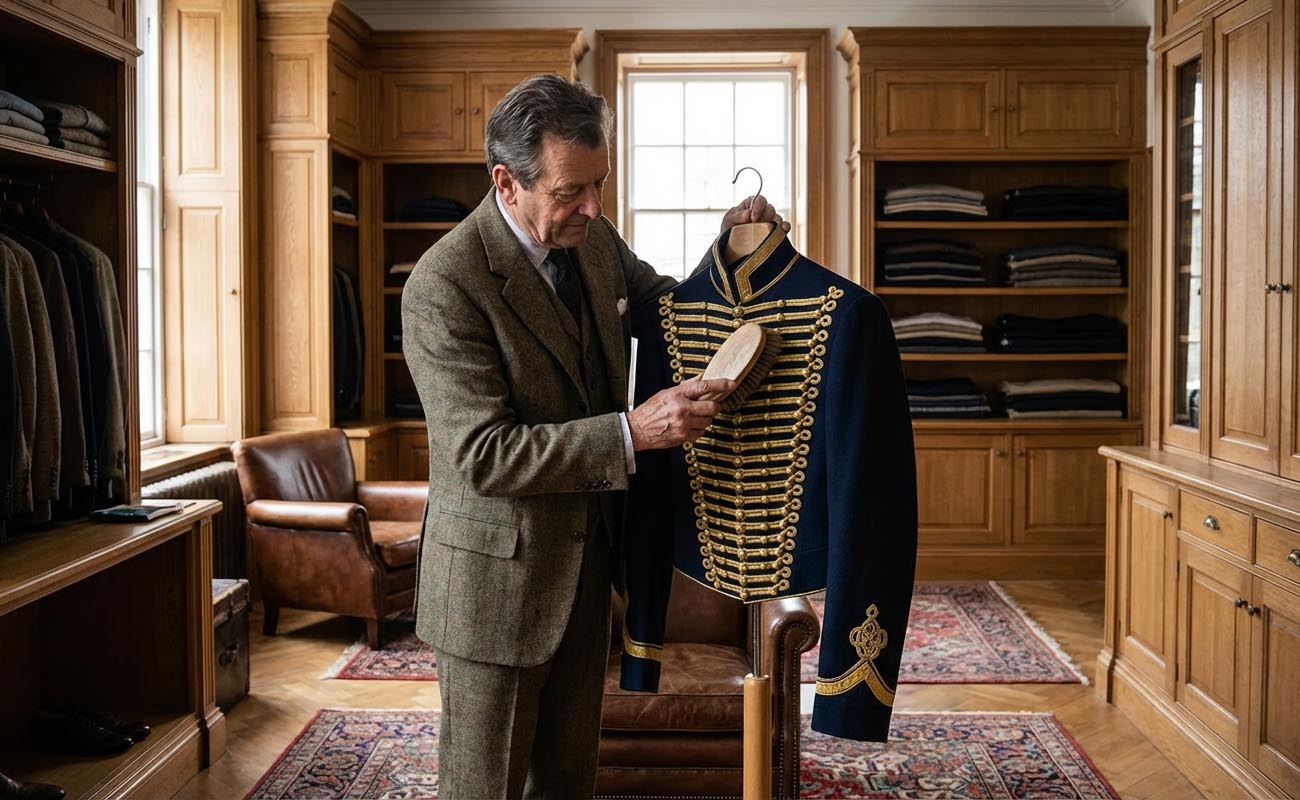
Proper maintenance preserves your jacket’s appearance and extends its wearable life for years of enjoyment. Most hussar jackets require dry cleaning due to the combination of wool outer fabric, delicate lining materials, and applied braiding. Store jacket on sturdy wooden hanger that supports the shoulder shape, avoiding wire hangers that cause distortion. Hang in a garment bag or a covered closet area to protect from dust, moths, and fading from light exposure.
Between wearings, brush the jacket gently with a clothes brush to remove surface dirt before it becomes embedded in fabric fibers. Address stains immediately by blotting gently with a clean cloth. Check buttons periodically to ensure they remain secure, re-sewing any that become loose. Inspect braiding regularly for loose ends or areas where stitching has come undone, repairing immediately to prevent further unraveling.
Troubleshooting Common Hussar Jacket Construction Problems
Even experienced sewers encounter challenges when creating complex garments like Hussar jackets. If your jacket pulls or puckers across the chest, you likely need additional ease through the body, or the braiding is applied too tightly. Let out side seams slightly or remove and reapply braiding with less tension. For collars that won’t stand properly, insufficient interfacing is typically the culprit, requiring removal and replacement with stiffer interfacing material.
Sleeves that bind during movement need more ease in the sleeve cap or deeper armhole. Braiding that appears wavy rather than lying flat results from either stretching the cord during application or insufficient pinning before stitching. Lining that bunches or pulls usually stems from inadequate ease allowance between the outer jacket and the lining. Learn from each challenge you encounter, as problem-solving builds skills that improve all your future sewing projects.
Customizing Your Hussar Jacket with Personal Design Elements
Creating a truly unique jacket involves adding personal touches that reflect your individual style and intended use. Consider incorporating elements such as contrasting color piping along seams, embroidered monograms or initials, custom braiding patterns, or mixed metal tones combining gold and silver braiding. Modern interpretations might include LED lighting strips woven into braiding for stage performances, unconventional color combinations, or steampunk elements like gears and leather accents.
For historical reenactors, research specific regiment colors, button styles, and braiding patterns that accurately represent your chosen unit and time period. Fashion-forward creations might incorporate luxury fabrics like velvet or brocade, oversized proportions for dramatic effect, or sustainable materials reflecting modern environmental consciousness. Document your creative choices throughout the construction process, as these notes prove valuable when creating future garments or helping others with their projects.
Styling and Wearing Your Completed Hussar Jacket
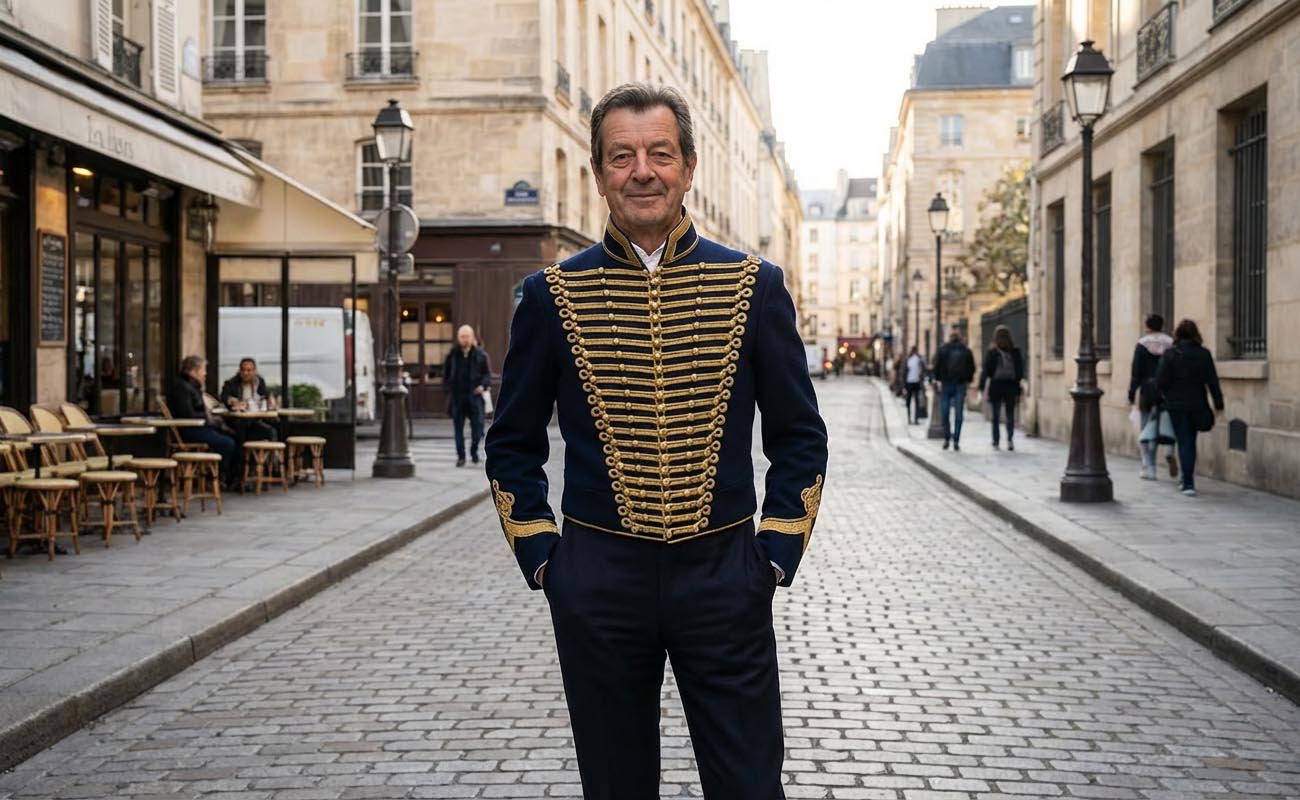
A finished hussar jacket offers remarkable versatility in modern wardrobes beyond costume events and historical reenactments. For formal occasions, pair your jacket with tailored trousers, a crisp white dress shirt, and polished leather shoes. The dramatic styling makes hussar jackets perfect for special events, theatrical performances, or wedding attire for bold fashion statements. Casual styling creates surprisingly wearable combinations by pairing the jacket with dark jeans, a simple t-shirt underneath, and ankle boots for a contemporary vibe.
For cosplay and costume events, complete your look with appropriate period accessories, including cavalry boots, riding gloves, military cap, and prop sword or saber. Steampunk styling combines the hussar jacket beautifully with goggles, leather accents, brass fittings, and Victorian-era trousers. Consider the weather and comfort when planning your complete outfit, as heavy wool jackets paired with multiple layers can become quite warm in heated indoor venues.
Expanding Your Skills: Advanced Hussar Jacket Techniques
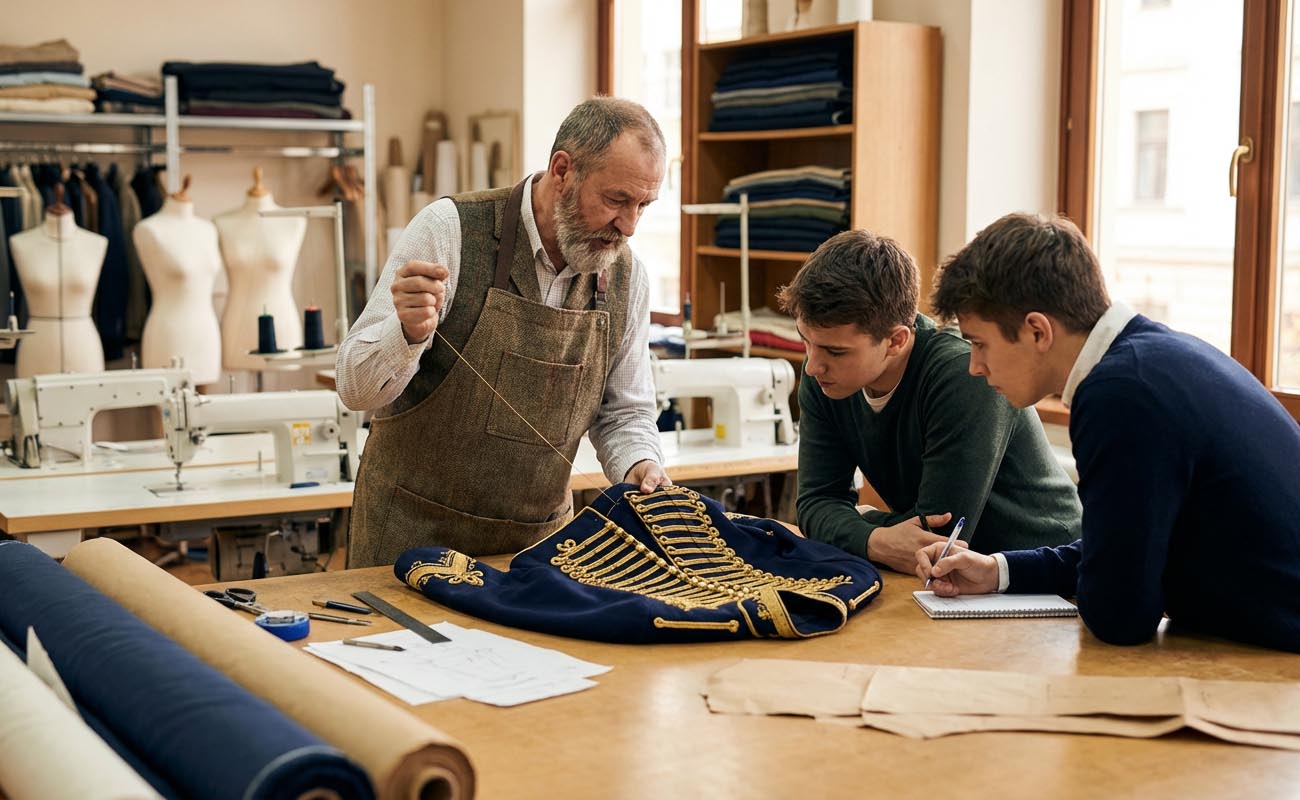
Once you’ve mastered basic hussar jacket construction, numerous advanced techniques await exploration for creating increasingly authentic and impressive garments. Hand-sewn buttonholes create period-appropriate closures with historic accuracy, though they require practice to achieve consistent results. Pad stitching through the collar and lapel layers adds traditional tailoring detail that improves shape retention. Creating custom-shaped buttons from scratch allows perfect matching to your specific design vision.
Drafting your own patterns from historical examples develops a deeper understanding of garment construction principles. Historical embroidery techniques can enhance plain fabrics with regimental insignia or decorative motifs. Learning to work with difficult fabrics like velvet or brocade broadens your material options for future projects. Consider taking workshops from experienced historical costumers, joining guilds or costuming organizations, and studying original garments whenever possible to deepen your understanding.
Conclusion: Celebrating Your Hussar Jacket Achievement
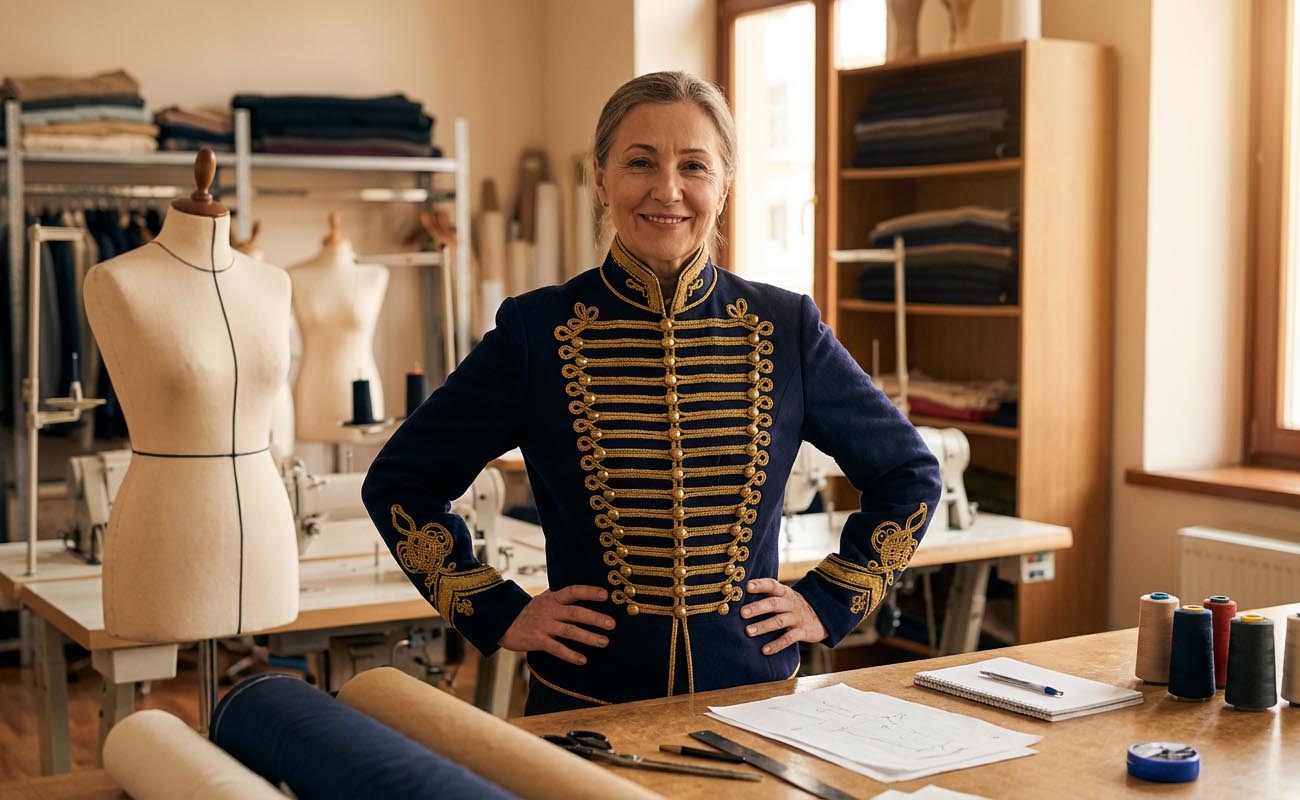
Completing a hussar jacket from scratch represents a significant accomplishment that demonstrates dedication, skill development, and creative vision. The combination of historical research, technical sewing ability, and artistic sensibility required for success makes this project a memorable milestone in any sewist’s journey. Your finished jacket serves as tangible evidence of hours spent learning new techniques, solving construction challenges, and pushing beyond comfortable skill levels into new territory.
The skills developed throughout this project transfer directly to countless other sewing endeavors, from tailoring everyday clothing to creating elaborate costumes. Share your creation with pride, whether wearing it to events, displaying it in your collection, or inspiring others through social media and crafting communities. Consider documenting your process through photographs or videos that help others undertake similar projects. Most importantly, celebrate the satisfaction that comes from creating something unique by your own hands, a handmade garment perfectly tailored to your body that no store-bought item could ever match.
Frequently Asked Questions About Making Hussar Jackets
The time required depends on your sewing experience and the complexity of your design. For beginners, expect to spend 30-40 hours over 2-3 weeks, including pattern preparation, cutting, construction, and applying decorative braiding.
Experienced sewers can complete a jacket in 20-25 hours. The most time-consuming aspect is hand-sewing the elaborate braiding patterns, which can take 8-12 hours alone depending on design intricacy.
Budget approximately $150-$300 for materials, depending on fabric quality and embellishment choices. Quality wool fabric costs $30-$60 per yard, military braiding runs $2-$5 per yard, lining fabric around $15-$25, and buttons and notions another $30-$50.
Purchasing from specialty suppliers like Scotland Kilt Collection can provide authentic military braiding, quality wool fabrics, and period-appropriate buttons that elevate your finished jacket’s authenticity and appearance.
Yes, but it’s recommended to have some intermediate sewing skills before attempting this project. Beginners should first practice basic jacket construction, setting sleeves, and working with interfacing on simpler projects.
Start with a straightforward design featuring minimal braiding, then progress to more elaborate patterns as your confidence grows. Following this detailed guide and working methodically through each step helps beginners achieve professional results.
Medium to heavyweight wool suiting fabric offers the best combination of authenticity, structure, and durability. Wool holds its shape well, supports heavy braiding without sagging, and provides an appropriate period appearance.
For budget-friendly alternatives, consider heavy cotton twill or wool-blend fabrics. Avoid lightweight or stretchy fabrics that won’t support the structured silhouette and decorative elements characteristic of authentic hussar jackets.
No expensive specialized tools are required for applying decorative braiding. You’ll need basic hand-sewing needles, matching thread, straight pins for positioning, and patience for detailed work.
A curved needle can help when sewing through multiple fabric layers, but it isn’t essential. The key to a professional-looking braiding application is careful planning, thorough pinning before stitching, and using small invisible slip stitches along both edges of the cord.