Blog
How To Make a Kilt | A Beginner-Friendly Guide
Making your own kilt at home might seem like a daunting task, but with the right guidance and patience, even beginners can create this iconic Scottish garment. A kilt is more than just a piece of clothing; it represents heritage, tradition, and personal style. Whether you want to honor your Scottish roots or simply enjoy the comfort and uniqueness of wearing a kilt, this comprehensive guide will walk you through every step of the process. From selecting the perfect tartan fabric to adding those final pleats, you’ll discover that creating a handmade kilt is an achievable and rewarding project that connects you to centuries of craftsmanship.
The beauty of making your own kilt lies in the customization possibilities and the satisfaction of creating something with your own hands. You can choose your favorite tartan pattern from traditional Scottish designs, ensure a perfect fit tailored to your measurements, and take pride in wearing something you crafted yourself. Whether authentic pieces from Scotland Kilt Collection inspire you or you want to create your own unique design, handmade kilts offer unparalleled personal expression. This guide is designed specifically for beginners with basic sewing skills who want to learn traditional kilt-making techniques. We’ll cover everything from measuring and cutting fabric to pleating methods and finishing touches that will make your kilt look professionally made. The process may take time, but the result will be a unique garment that you’ll treasure for years to come.
Understanding the Kilt: History and Components
Before diving into the construction process, it’s essential to understand what makes a kilt unique and why it has remained an enduring symbol of Scottish culture. The traditional Scottish kilt has been worn for centuries and features distinctive elements that set it apart from other garments. A proper kilt typically reaches the knee, wraps around the body, and is held in place with straps and buckles. The most recognizable feature is the pleating at the back, which creates the kilt’s characteristic fullness and allows for ease of movement. This design isn’t just aesthetic; it’s functional, allowing wearers to move freely whether they’re dancing, working, or engaging in physical activities.
The modern kilt consists of several key components that work together to create the final garment, each serving a specific purpose. The apron is the flat front section that wraps across the body, displaying the tartan pattern prominently. Meanwhile, the pleats form the back portion, traditionally pleated to follow the tartan’s pattern or “sett.” Fell stitching secures the pleats in place along the hipline, ensuring they maintain their shape during wear. The waistband provides structure and houses the buckle straps for fastening, distributing the weight of the fabric evenly around your waist. Understanding these components will help you visualize the finished product as you work through each construction stage and appreciate the engineering that goes into this traditional garment.
Essential Materials and Tools You’ll Need
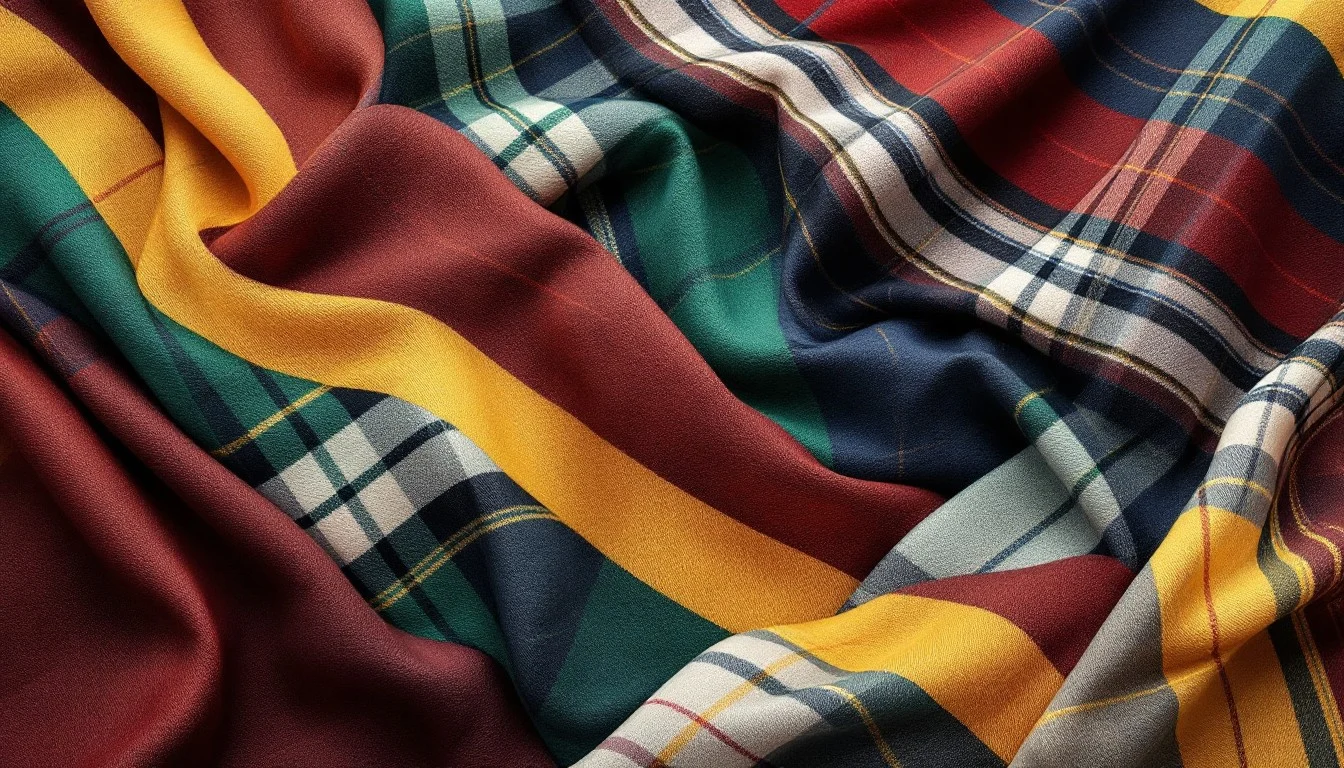
Gathering the right materials before starting your project will make the kilt-making process much smoother and more enjoyable. The most important material is your tartan fabric, which you’ll need approximately 6 to 8 yards, depending on your waist size and desired pleat depth. For someone with a 32-inch waist, 6 yards is usually sufficient, while larger sizes may require the full 8 yards. Choose a medium-weight wool or wool-blend fabric that has good drape but enough body to hold pleats well. Avoid fabrics that are too stiff or too lightweight, as they won’t produce the desired effect. Quality tartan fabric can be purchased from specialty Scottish retailers or online fabric stores that specialize in authentic tartans.
| MATERIAL/TOOL | QUANTITY NEEDED | PURPOSE |
|---|---|---|
| Tartan Fabric | 6-8 yards | Main kilt body and pleats |
| Matching Thread | 2-3 spools | Sewing and finishing |
| Interfacing | 2 yards | Waistband structure |
| Kilt Buckles & Straps | 3 sets | Fastening the kilt |
| Kilt Pin | 1 piece | Decoration and weight |
| Fabric Scissors | 1 pair | Cutting fabric accurately |
| Measuring Tape | 1 piece | Taking body measurements |
| Iron & Ironing Board | 1 set | Pressing pleats and seams |
Having quality tools makes a significant difference in your results and can mean the difference between a frustrating experience and an enjoyable one. A heavy-duty sewing machine is particularly important because kilt fabric can be thick, especially when you’re stitching through multiple layers of pleats. Make sure your machine can handle the fabric weight, and use appropriate needles designed for heavyweight materials, typically size 16 or 18. An iron is absolutely crucial for creating crisp, professional-looking pleats that will hold their shape over time. A good steam iron with adjustable temperature settings will be your best friend throughout this project. Beyond the basics listed in the table above, you’ll also want to keep a seam ripper handy for any corrections, safety pins for temporary holding while you work through the pleating process, and plenty of straight pins for securing fabric layers. A clear ruler or grid ruler is invaluable for marking straight pleat lines, and tailor’s chalk or a fabric marking pen that washes out will help you mark your fabric without leaving permanent marks.
Taking Accurate Measurements for a Perfect Fit
Accurate measurements are the foundation of a well-fitting kilt that looks flattering and feels comfortable throughout the day. Unlike pants, kilts sit higher on the natural waist rather than the hips, which is crucial to understand before you begin measuring. Start by measuring around your natural waistline, which is typically just above your belly button, at the narrowest part of your torso. Keep the measuring tape snug but not tight, and make sure it’s parallel to the ground all the way around. Write down this measurement as it will determine your waistband size. It’s helpful to have someone assist you with measurements to ensure accuracy, though you can do it yourself with patience and a mirror.
The length of your kilt should fall to the center of your kneecap when you’re standing straight with your weight evenly distributed. Measure from your natural waist down to the middle of your knee to get this dimension. This traditional length is both practical and aesthetically pleasing, allowing for comfortable movement while maintaining the classic kilt appearance that has been refined over centuries. You’ll also need to measure your hip circumference at the fullest part, typically about 7 to 9 inches below your waist. This measurement affects how much fabric you’ll need for proper pleating and ensures the kilt will fit comfortably over your hips without being too tight or too loose.
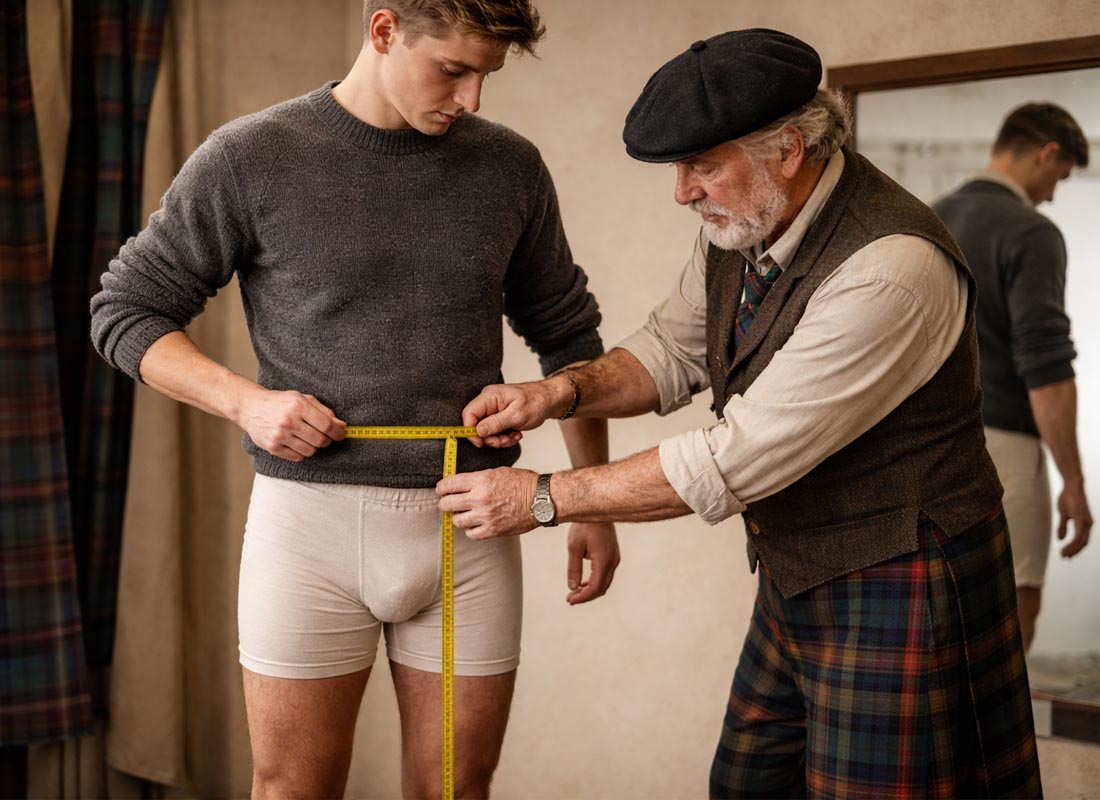
The final measurement you need is the “rise,” which is the distance from your waist at the side down to where you want the kilt to fall, following the curve of your body. This measurement helps ensure the kilt hangs properly without gapping at the waist or pulling across the hips. Add an extra inch to your length measurements for hem allowance, and add three inches to your waist measurement for overlap and fastening. Taking time to measure carefully now will save you from fitting problems later and reduce the likelihood of having to make major alterations. Consider measuring twice and recording your measurements in a notebook dedicated to this project, along with any notes about fit preferences or adjustments you might want to make.
Preparing and Cutting Your Tartan Fabric
Proper fabric preparation ensures your finished kilt maintains its shape and appearance through wear and washing, making this preliminary step crucial. Before cutting anything, pre-wash your tartan fabric according to the manufacturer’s instructions. This step is crucial because wool and wool-blend fabrics often shrink during the first wash, and you want that shrinkage to happen before you’ve invested hours of work into the garment. Press the fabric thoroughly with a steam iron to remove any wrinkles and restore the fabric’s natural texture. Let the fabric rest for a few hours after pressing to allow it to return to its natural state before you begin cutting.
Lay your fabric out on a large, flat surface where you can see the entire piece without any hanging over edges that might distort the fabric. A large cutting table is ideal, but a clean floor works well too if you don’t mind working on your knees. Examine the tartan pattern carefully to understand how the colors and lines intersect and repeat. Traditional kilt-making follows the pattern lines to create visual continuity in the pleats, which is what gives kilts their distinctive appearance. The lengthwise grain should run vertically on your body when the kilt is worn. Use a ruler and fabric marker to draw cutting lines, double-checking all measurements before you make any cuts. Remember the old carpenter’s adage: measure twice, cut once.
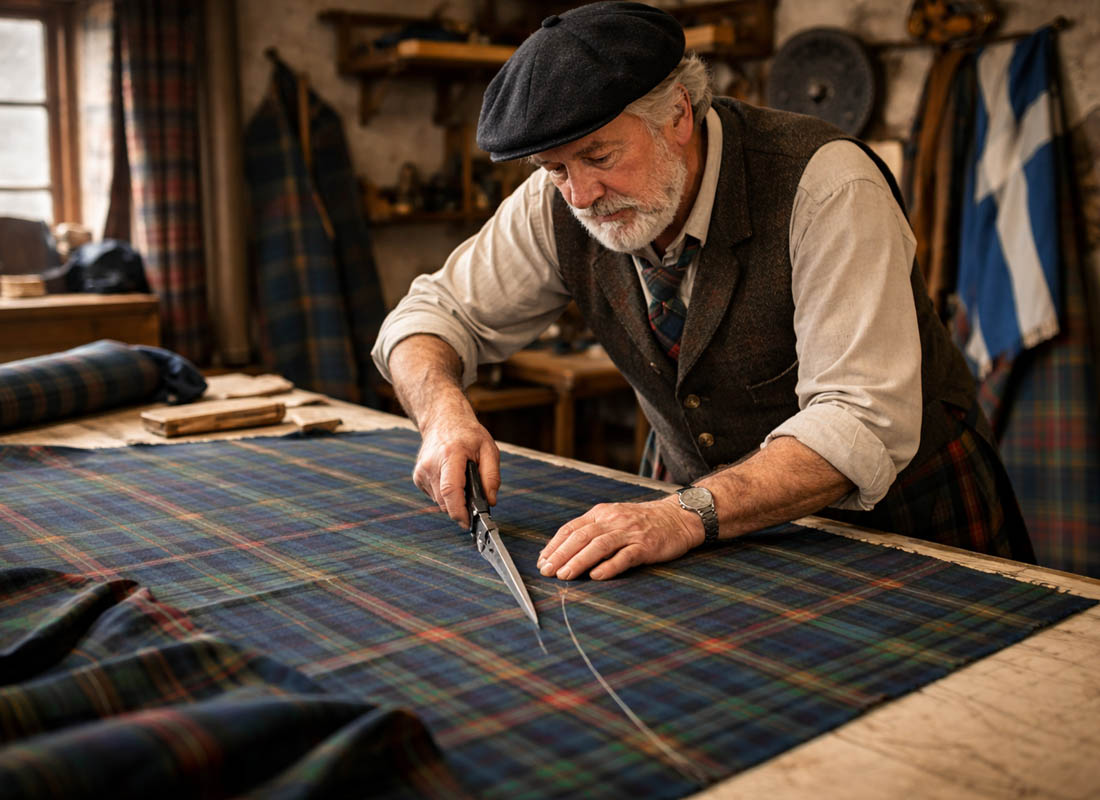
Cut one piece for the main kilt body, which should be your hip measurement plus 24 inches for pleating, by your length measurement plus hem allowance. If your hips measure 40 inches, you’ll need fabric that’s 64 inches wide for the body. You’ll also need to cut strips for the waistband, which should be 3 inches wide and the length of your waist measurement, plus 6 inches for finishing and overlap. Cut the fabric carefully using sharp fabric scissors or a rotary cutter with a cutting mat to ensure clean, straight edges. Dull scissors can cause frayed edges and uneven cuts that will be visible in the finished garment. Save larger scraps as they can be useful for making accessories like a sporran, matching tie, or even practice pieces if you want to test your pleating technique before working on the actual kilt.
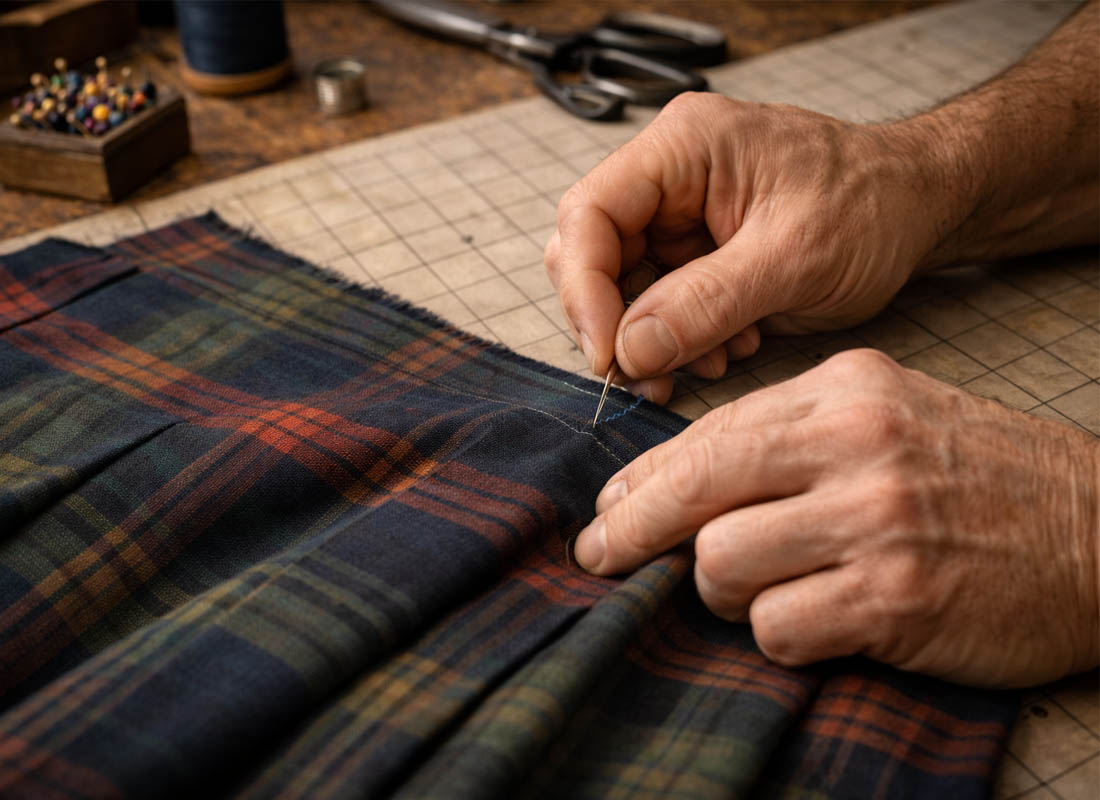
Creating Traditional Box Pleats Step by Step
Pleating is the most challenging yet rewarding part of kilt-making, and it’s what gives the garment its distinctive appearance and allows it to swing gracefully when you walk. Traditional Scottish kilts use knife pleats that are “pleated to the sett,” meaning the pleats follow the pattern of the tartan so that specific colors line up when the pleats are folded. For beginners, box pleats or knife pleats that are simply evenly spaced work beautifully and are easier to master while still creating an authentic look. Start by marking pleat lines on the wrong side of your fabric using a ruler and fabric marker, spacing them evenly across the width of the fabric that will become the pleated section.
Begin pleating from one side of the fabric, working systematically across the width in one direction to maintain consistency. Each pleat typically uses about 3 inches of fabric and shows approximately 1 inch when folded, though you can adjust these measurements based on how full you want your kilt to be. Pin each pleat carefully, making sure they’re all the same depth and aligned perfectly both vertically and horizontally. Press each pleat firmly with a hot iron as you go, using steam to help set the folds and create memory in the fabric. This pressing step is critical because it creates memory in the fabric that helps the pleats hold their shape even after repeated wearings. Work slowly and methodically, as rushing this stage will result in uneven pleats that will be noticeable in the finished garment.
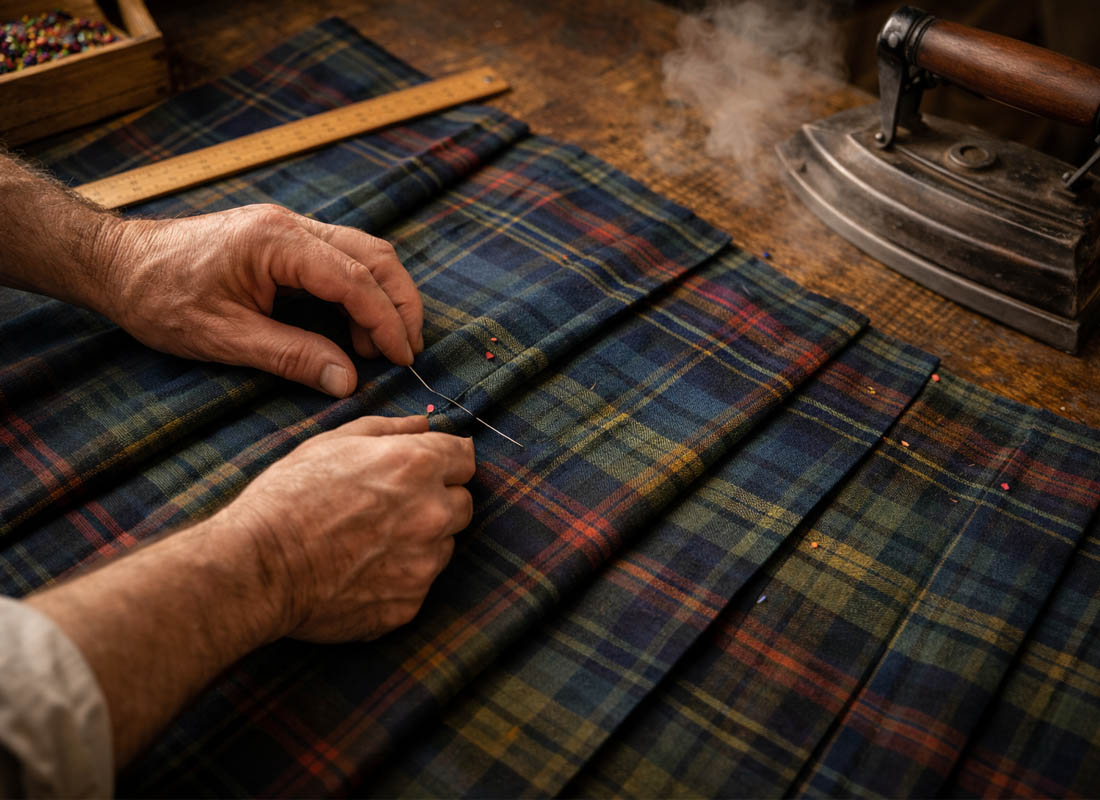
Once all pleats are pinned and pressed, baste them in place with long running stitches about 2 inches from the top edge, where they’ll be attached to the waistband. This temporary stitching keeps everything secure while you work on the rest of the construction and prevents pleats from shifting. Try the pleated section around your hips to ensure the fit is comfortable and the pleats lie flat without gapping or pulling. Make any necessary adjustments now before proceeding to permanent stitching, as it’s much easier to adjust at this stage than after everything is sewn together. The pleats should feel secure but allow for easy movement and sitting. Walk around, sit down, and move naturally to test the comfort and drape of your pleated section.
Constructing the Waistband and Apron
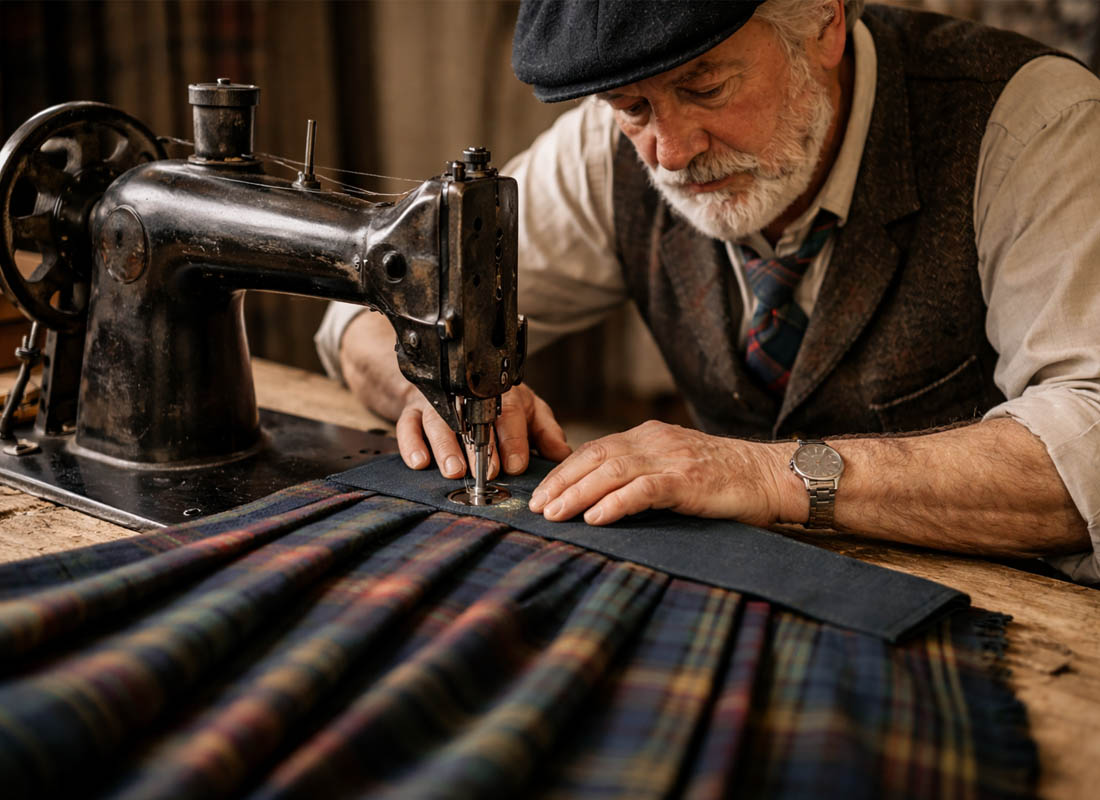
The waistband provides crucial structure to your kilt and helps it sit properly on your body throughout the day, supporting the weight of the heavy pleated fabric. Cut your waistband pieces from your remaining fabric, then interface them with a sturdy interfacing material to add stiffness and prevent stretching. Fusible interfacing works well for this application and can be ironed on quickly. Fold the waistband strip in half lengthwise with wrong sides together and press firmly. This creates a clean, professional finish that will withstand the stress of wearing and fastening repeatedly over the life of the garment.
Attach the waistband to the top edge of your pleated section, aligning raw edges carefully and making sure the pleats remain straight and even as you sew. Sew with a strong straight stitch, backstitching at both ends for reinforcement that will prevent the seam from pulling apart. The waistband should extend beyond the pleated section on both sides to create the apron panels that wrap around your front. These apron panels remain flat and unpleated, creating the characteristic kilt silhouette and providing a smooth surface that displays the tartan pattern beautifully. The contrast between the flat front panels and the pleated back is part of what makes a kilt visually interesting.
The front apron sections need to be wide enough to overlap comfortably when you fasten the kilt, providing both security and modesty. The underlap should extend approximately 6 inches past your center front, while the overlap extends about 8 inches past the center. This overlap creates a secure closure and the traditional kilt appearance that’s been refined over centuries of wear. Finish the raw edges of the apron sections with a serger or zigzag stitch to prevent fraying during wear and washing. Press all seams flat and topstitch the waistband for added strength and a polished look. This topstitching also helps the waistband lie flat and provides visual interest.
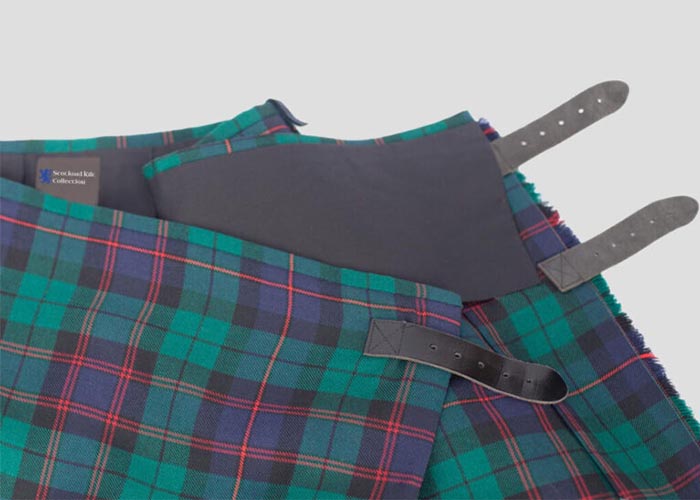
Installing Straps, Buckles, and Fasteners
Proper fasteners ensure your kilt stays securely in place throughout wear, whether you’re sitting, standing, or engaging in active movement. Traditional kilts use leather straps with metal buckles, though you can use heavy-duty fabric straps if you prefer or if leather is outside your budget. Position the first buckle on the underlap side of the waistband, approximately 2 inches from the edge. Sew it securely through all layers, reinforcing with a box stitch pattern that distributes stress evenly and prevents the buckle from pulling loose during wear.
Buckle Placement Guidelines:
- Left hip buckle: Adjust the kilt’s tightness
- Right hip buckle: Secures the overlap
- Center back buckle: Optional for extra security
Attach corresponding strap pieces to the overlap section, making sure they’re long enough to reach the buckles comfortably with room for adjustment if your weight fluctuates. Test the fit by wrapping the kilt around your waist and fastening all buckles. You should be able to fasten the kilt snugly without feeling restricted, and there should be enough overlap to maintain modesty and security. The kilt should sit at your natural waist without sliding down, even when you move actively. If it feels like it might slip, consider adding the optional back buckle for extra security.
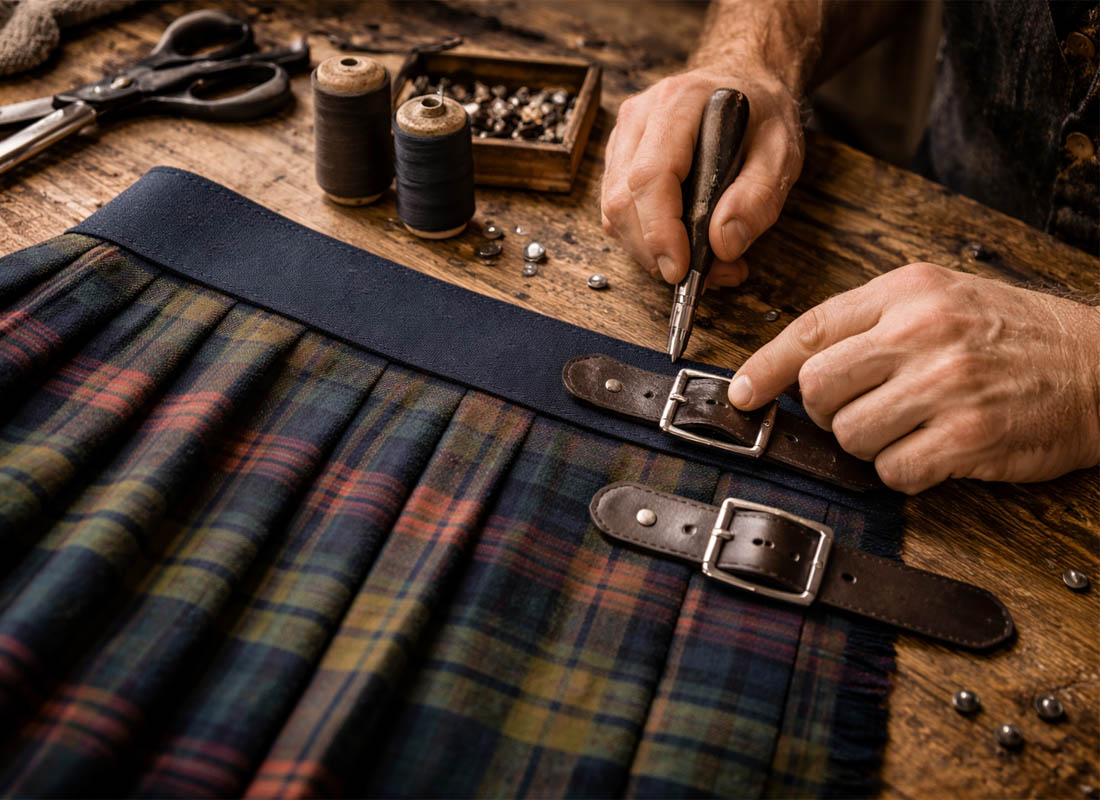
Add a kilt pin to the front apron on the overlap side, positioned about 4 inches from the bottom edge and 3 inches from the outer edge. Despite popular belief, the kilt pin is decorative and doesn’t actually pin through both layers—it only goes through the top layer. It adds visual interest and helps weigh down the apron to prevent it from blowing up in windy conditions. Choose a pin that complements your tartan colors and personal style, whether that’s a traditional Celtic design, a clan badge, or something more contemporary.
Hemming and Finishing Touches for Professional Results
A proper hem gives your kilt a finished, professional appearance and protects the fabric edge from fraying during wear. Turn up the bottom edge of your kilt by 1 inch, press firmly to create a crisp fold, then turn up another inch and press again. This double-fold hem conceals raw edges and adds weight to the bottom of the kilt, helping it hang properly and swing gracefully when you walk. Pin the hem in place all around, making sure it’s even, and the pleats remain straight and aligned.
Stitch the hem by hand using a blind hem stitch for an invisible finish, or use your machine’s blind hem foot if you prefer and are comfortable with machine hemming. Hand-sewing takes longer but gives you more control and creates a hem that’s virtually invisible from the outside, which is the traditional approach. Usea thread that matches your fabric color and take small, even stitches about 1/4 inch apart. Work your way around the entire kilt, checking frequently that you’re not accidentally stitching through to the outside layer where the stitches would be visible.
The final finishing step is fell stitching the pleats, a traditional technique that involves hand-stitching the inner folds of the pleats to keep them in place along the hip line. This stitching typically extends from the waistband down about 6 to 8 inches, securing the pleats where they experience the most stress from sitting and moving. Use a matching thread and small, neat stitches that won’t show from the outside. Press the entire kilt one final time with steam, paying special attention to the pleats to set them permanently. Hang the kilt and let it rest for at least 24 hours before wearing it to allow the fabric to relax and settle into its final shape.
Caring for Your Handmade Kilt
Proper care ensures your handmade kilt remains beautiful and wearable for years to come, potentially becoming an heirloom piece. After each wearing, hang your kilt upside down on a kilt hanger or over a wide hanger to allow the pleats to hang straight and air out naturally. This prevents the fabric from developing permanent wrinkles in the wrong places and helps maintain the pleat definition you worked so hard to create. Avoid folding your kilt if possible, as this can create unwanted creases that become increasingly difficult to press out over time.
Most kilts only need occasional cleaning rather than washing after every wear, as wool naturally resists odors and dirt. Spot clean minor stains with a damp cloth and mild detergent, working gently to avoid disturbing the pleats. When your kilt needs a thorough cleaning, consider taking it to a professional dry cleaner who has experience with kilts and wool garments. If you prefer to wash it at home, use cold water and a gentle cycle, then hang it to dry while the fabric is still damp and reshape the pleats by hand.
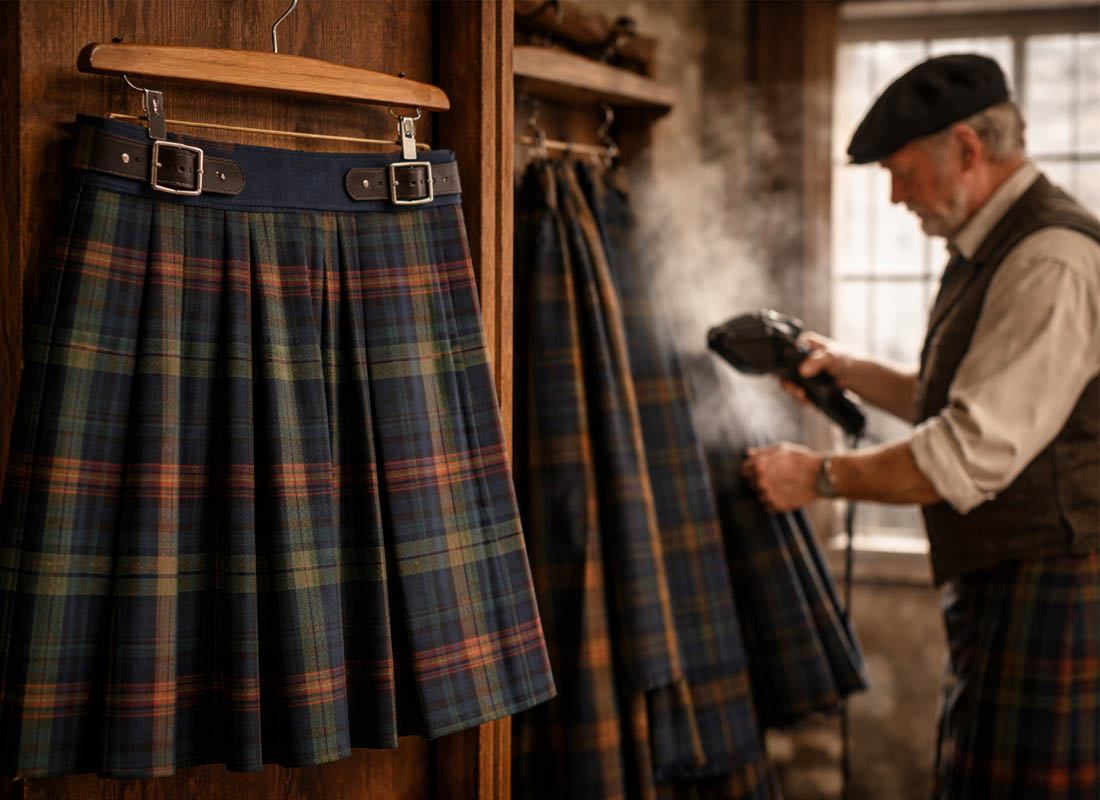
Steam pressing between wears helps refresh your kilt and maintain crisp pleats that look as good as new. Hang the kilt and use a handheld steamer, or carefully press with an iron using a pressing cloth to protect the fabric from shine or scorch marks. Focus on the pleats, pressing them from the top down to reinforce their shape and restore any crispness lost during wear. Store your kilt in a breathable garment bag in a cool, dry place away from direct sunlight, which can fade the colors of your tartan over time and damage the wool fibers.
Common Mistakes to Avoid When Making Your First Kilt
Even experienced sewers can encounter challenges when making their first kilt, so don’t be discouraged if you face some difficulties. One of the most common mistakes is rushing through the pleating process without taking time to measure and pin accurately. Uneven pleats will be noticeable in the finished garment and difficult to correct once stitched permanently. Take your time with this step, measuring each pleat carefully and pressing thoroughly as you go. Remember that kilt-making is as much about patience as skill.
Another frequent error is choosing fabric that’s too lightweight or too heavy for a beginner project, either because of budget constraints or lack of knowledge. Very lightweight fabrics won’t hold pleats well and will result in a kilt that looks limp rather than structured, while extremely heavy wool can be difficult to sew through and manipulate, especially when working with multiple layers. Aim for a medium-weight tartan that has good body but isn’t rigid. Similarly, trying to save money by purchasing insufficient fabric often leads to problems that can’t be fixed without buying more fabric anyway. Always buy the recommended yardage plus a little extra for mistakes and practice.
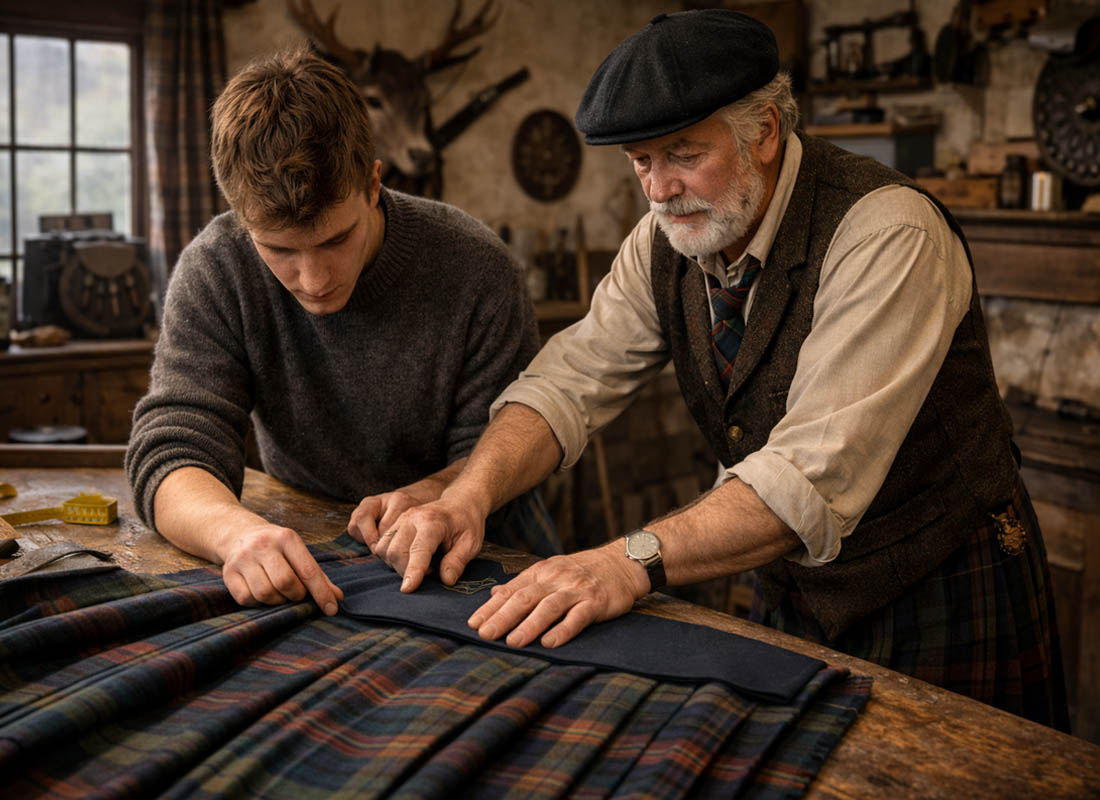
Many beginners neglect the importance of proper pressing throughout the construction process, viewing it as an optional step rather than essential. Each seam should be pressed open or to one side as you work, and pleats must be thoroughly pressed to hold their shape. Skipping these pressing steps results in a less professional-looking finished product that won’t wear as well. Finally, don’t skip the fitting stage or convince yourself that ill-fitting areas will somehow work themselves out. Try on your kilt multiple times during construction to ensure the fit is comfortable and make adjustments before you’ve completed too many steps that would need to be undone.
Conclusion: Your Journey to Kilt-Making Success
Creating your own kilt is a meaningful accomplishment that connects you to centuries of Scottish tradition while allowing you to express your personal style and creativity. This beginner-friendly guide has walked you through every step, from understanding kilt components and selecting materials to pleating techniques and finishing touches that make your garment look professional. While the process requires patience and attention to detail, the skills you’ve learned are valuable and can be applied to other sewing projects, from historical costumes to modern fashion pieces.
Remember that your first kilt doesn’t need to be perfect to be wearable and beautiful—in fact, small imperfections often add character and prove it’s handmade. Each kilt you make will improve your skills and understanding of the construction process, and you may find yourself wanting to make more kilts in different tartans. The most important thing is that you’ve created something unique with your own hands, something that tells a story of your dedication and craftsmanship. Wear your handmade kilt with pride, knowing that you’ve mastered a traditional craft that few people today take the time to learn.

As you gain confidence, you can explore more advanced techniques like pleating the sett, adding decorative elements such as embroidery or custom buckles, or experimenting with different tartan patterns and color combinations. The world of kilt-making offers endless possibilities for creativity and personalization, from traditional formal kilts to modern utility kilts for everyday wear. Whether you’re making kilts for special occasions like weddings and Highland games, cultural events, or everyday wear, you now have the foundation to create beautiful, well-constructed garments that honor this timeless tradition and will last for generations.
Frequently Asked Questions About Making a Kilt
You’ll need 6 to 8 yards of tartan fabric, depending on your waist size. Smaller waist sizes (under 34 inches) typically require 6 yards, while larger sizes need 7-8 yards. The fabric should be 60 inches wide for the best results.
Yes! While it requires patience and basic sewing skills, beginners can absolutely create a beautiful kilt. Start with simple knife pleats rather than complex pattern-matching techniques. Allow yourself plenty of time and don’t rush the pleating process.
Expect to spend 15-25 hours on your first kilt. This includes measuring, cutting, pleating, sewing, and finishing. The pleating alone can take 6-8 hours as it requires precision and patience.
Medium-weight wool or wool-blend tartan fabric works best. It should have enough body to hold pleats but not be too stiff. Avoid lightweight fabrics that won’t maintain pleat definition and very heavy fabrics that are difficult to sew through.
A heavy-duty sewing machine is recommended since you’ll be sewing through multiple layers of thick fabric. Use size 16 or 18 needles designed for heavy materials. A regular machine can work if it handles denim well.
A kilt should sit at your natural waist (above the belly button), not on your hips. The bottom edge should reach the center of your kneecap when standing. It should be snug enough not to slip but comfortable enough to sit and move freely.
Want to see this entire kilt-making process in action? Watch our detailed video tutorial below, where we demonstrate each step visually, making it even easier to follow along and create your perfect kilt at home.